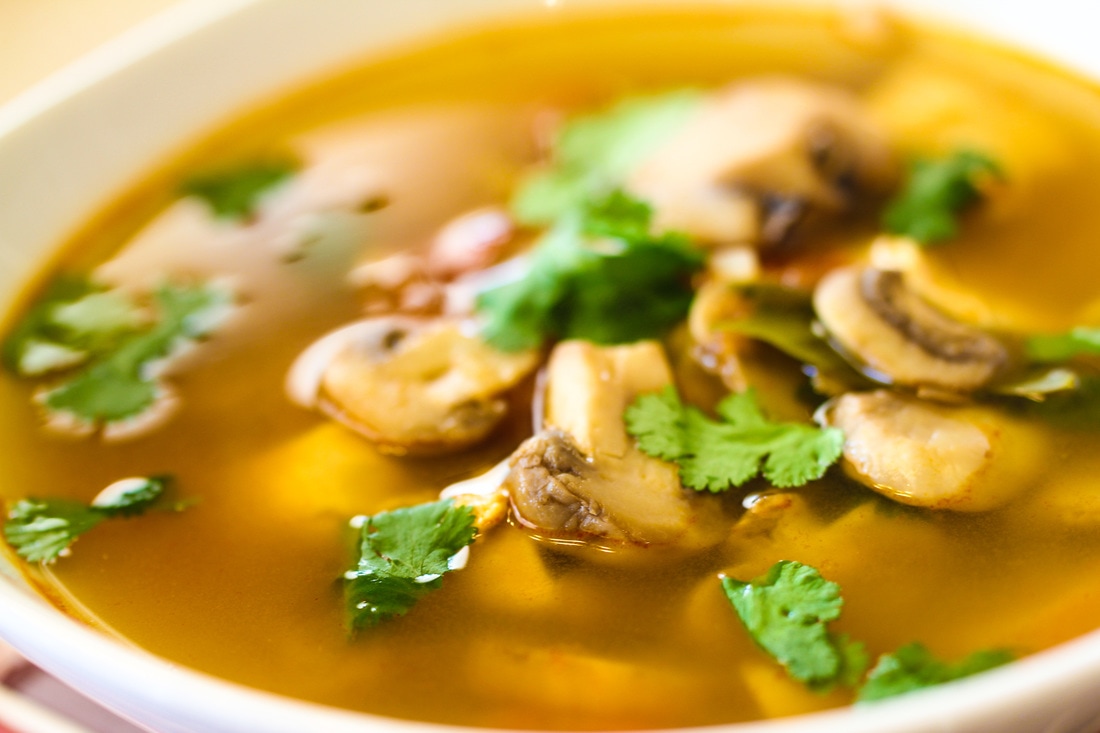
 Hot and Sour Soup with Chicken (Tom Yum Gai) is probably the one of the most famous Thai dishes in the world. There are hundreds of variations, like Tom Yum Goon which uses shrimp instead. It is a wonderful dish and I prefer it spicy. You can sieve out the parts of this soup you don't eat before serving - like lemongrass stalks, galangal, and lime leaves. If serving this to guests who are unfamiliar with Thai food, you may want to let them know what to eat and what not to eat before serving. It is an easy soup to prepare but so flavorful if you have the right ingredients.
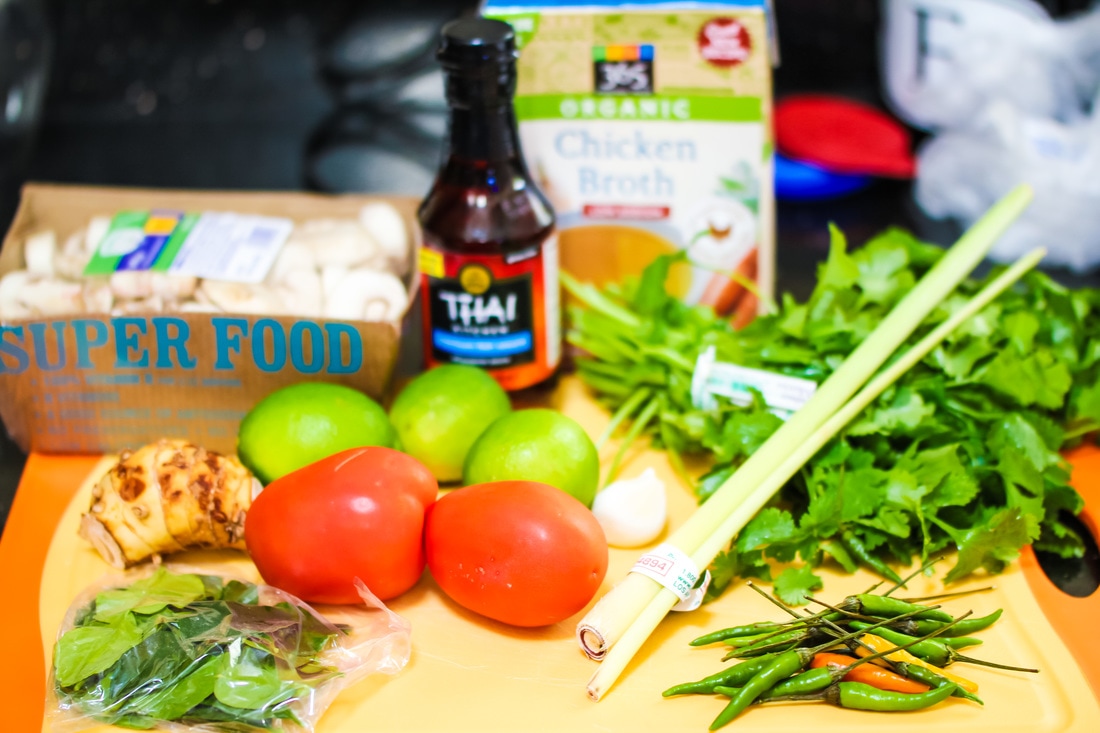
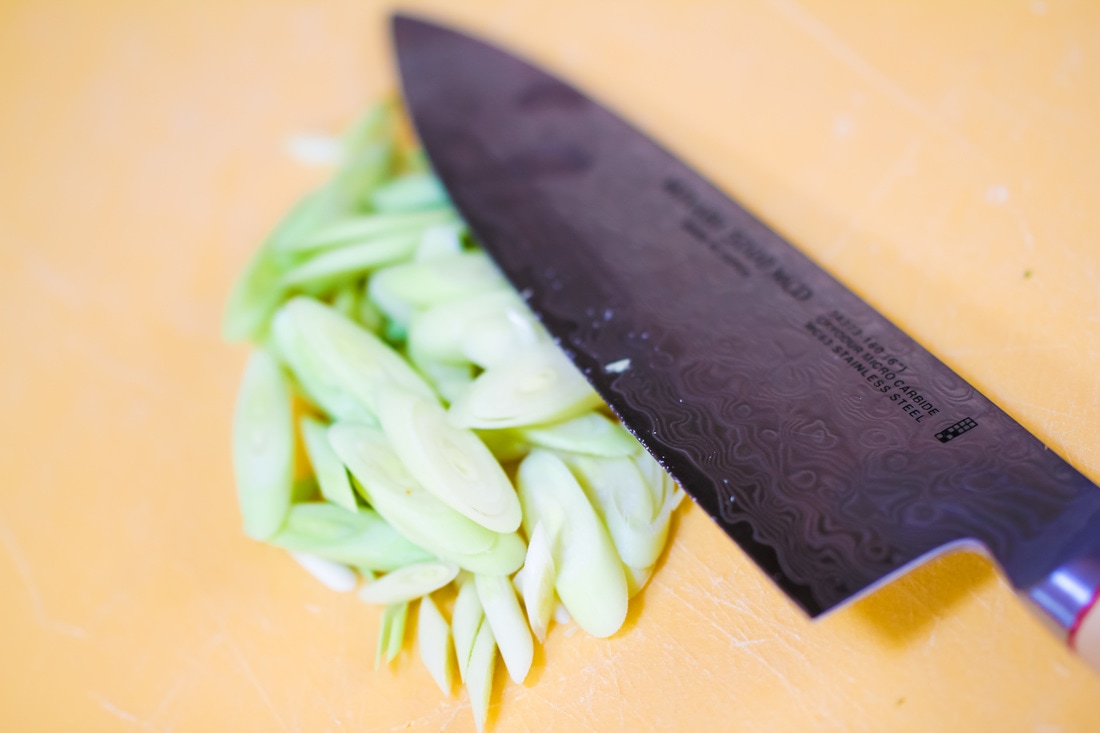
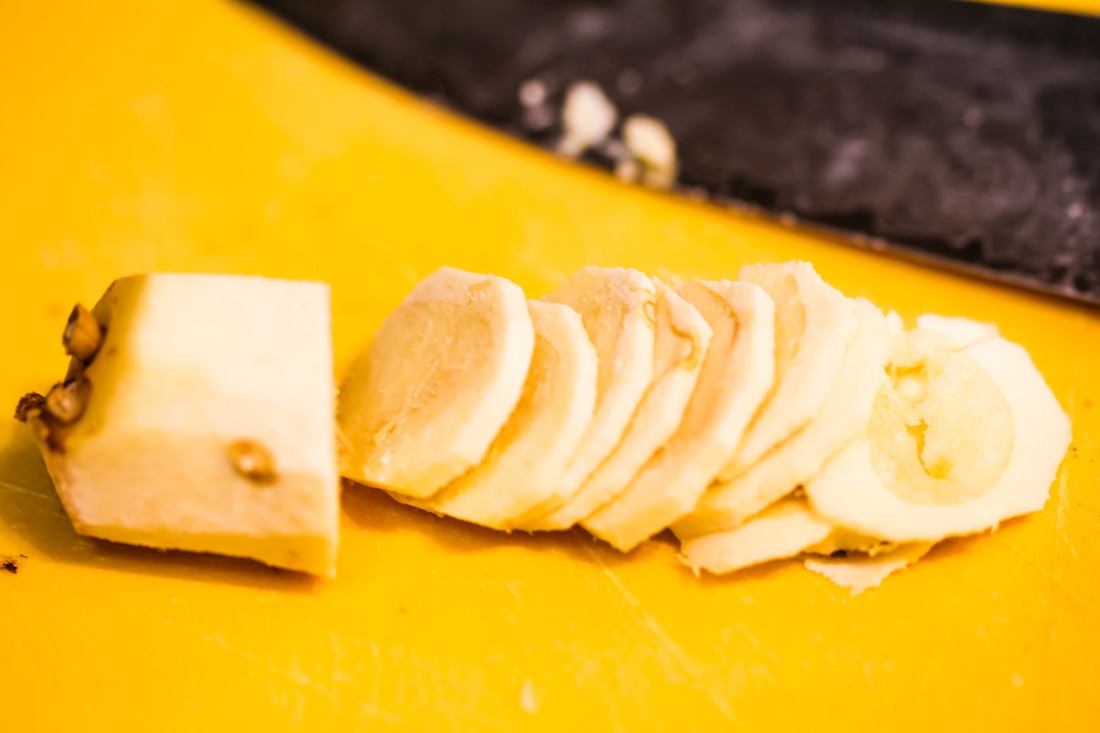
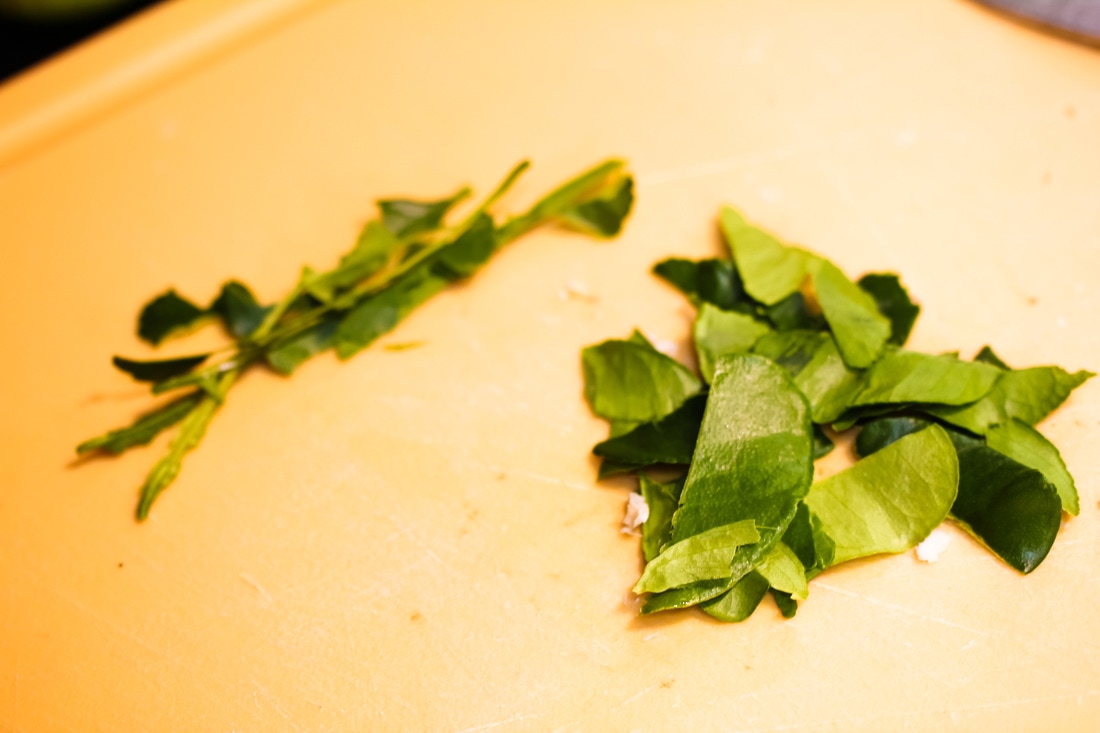
Start with preparing the ingredients for the soup. Remove the outer layer of the lemongrass stalks and cut off the end. Cut into 1-2″ pieces and smash with the side of a heavy knife to release flavor. Peel and slice your galangal into thin slices. Tear the center vein off the Kaffir lime leaves. Tear each leave half into two pieces , this will help release the flavors quicker into the soup.
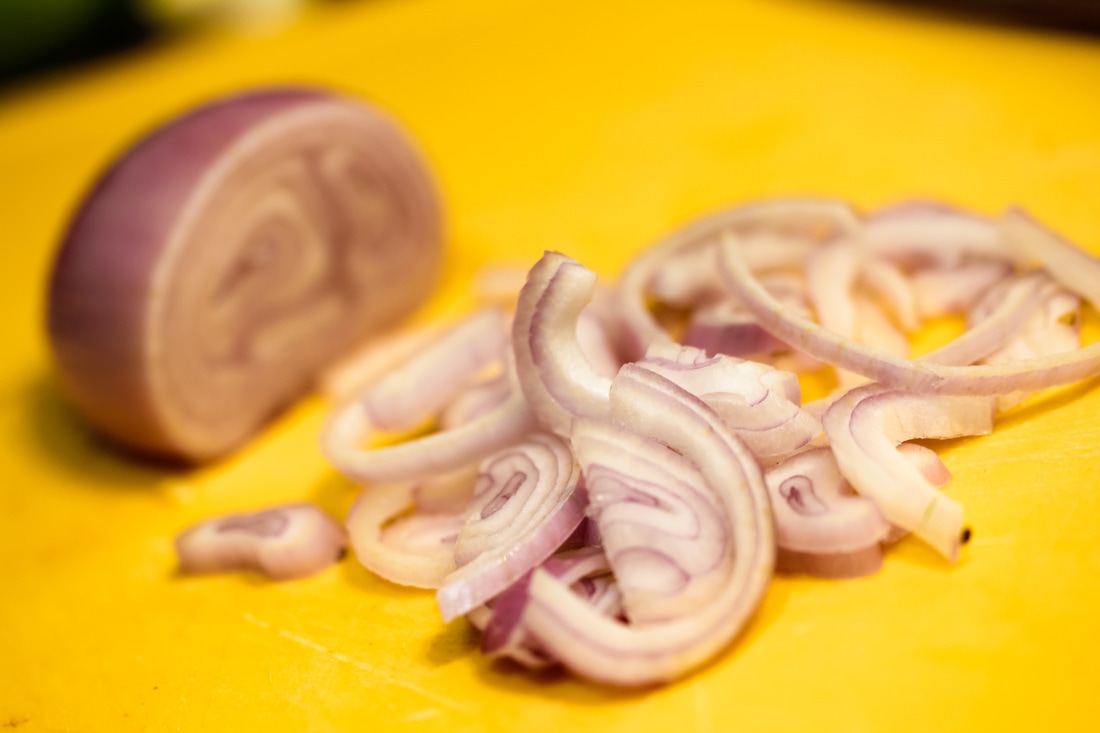
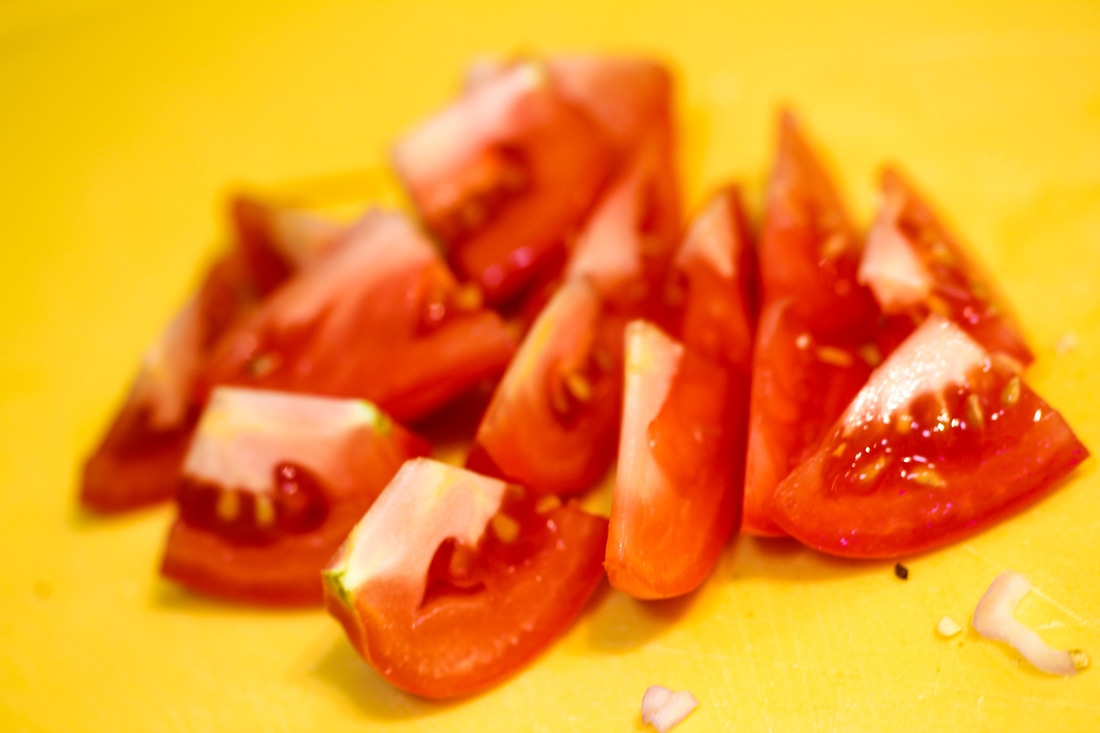
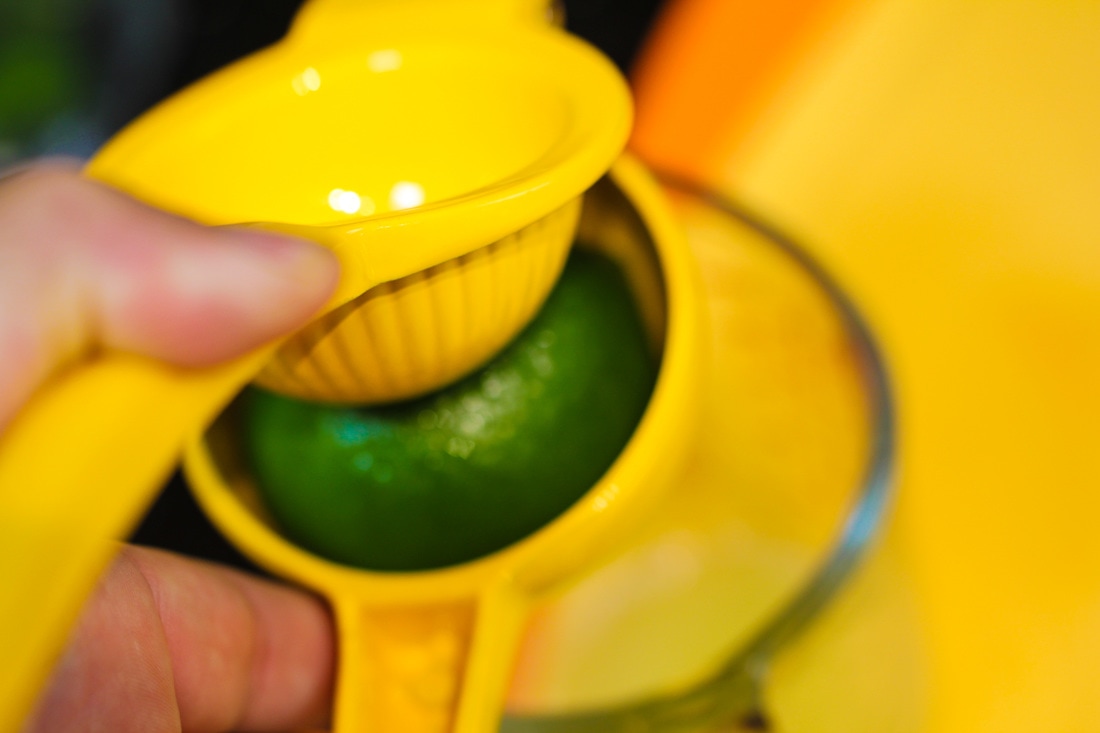
Cut the tomato into 6 pieces lengthwise and cut each slice into two . Peel the skin off the shallots, slice it thinly and smash lightly. Finally press the limes.
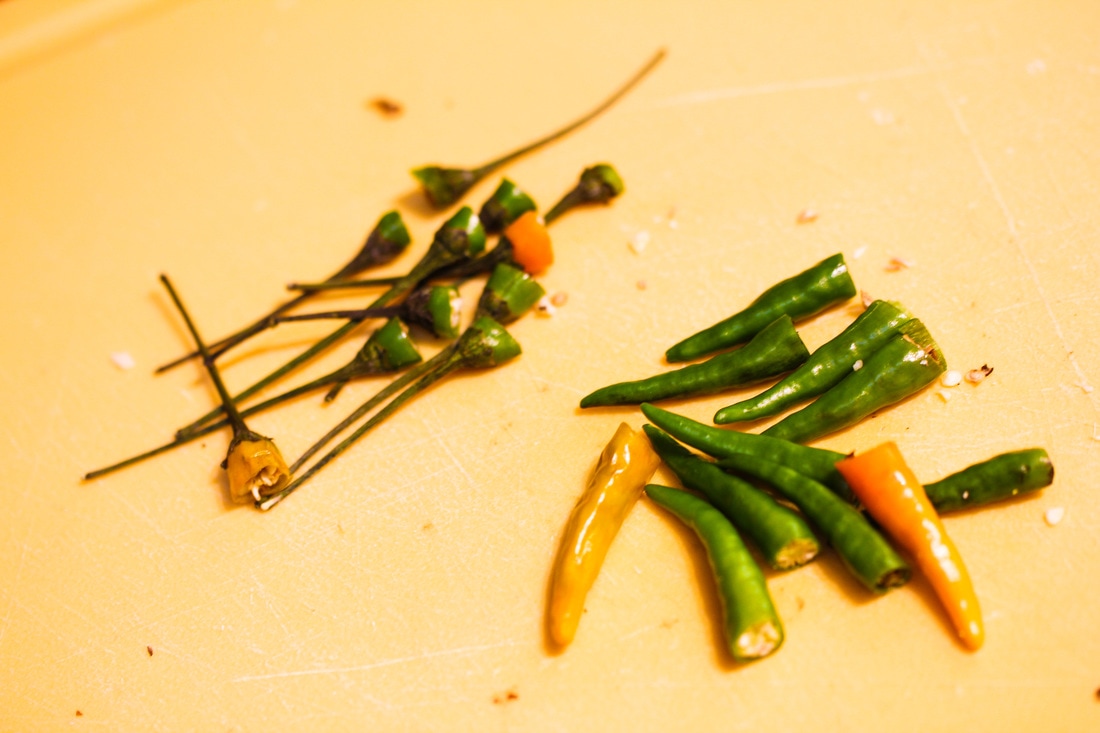
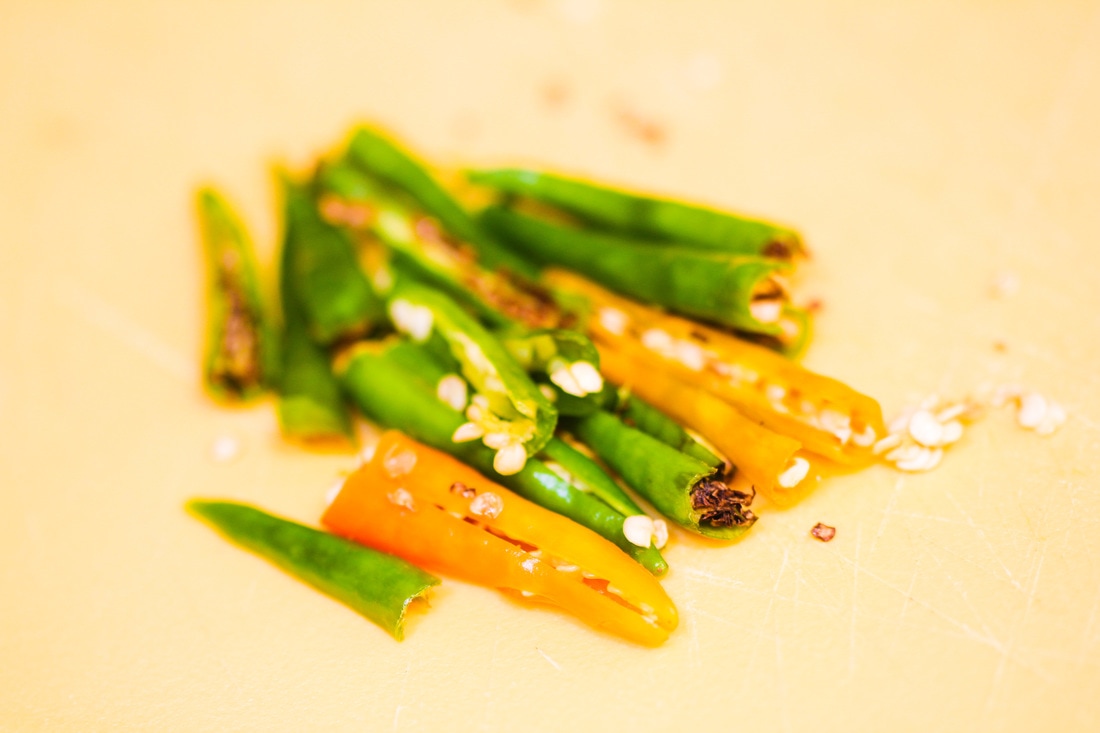
Cut the stem of the chilies and cut each chili in half lengthwise.Smash the fresh chilies with the back of a heavy knife, or in a mortar and pestle. The amount of chili you use will decide how spicy the soup will be. If you like it less spicy, use only 3-4 Thai chilies and remove the seeds.
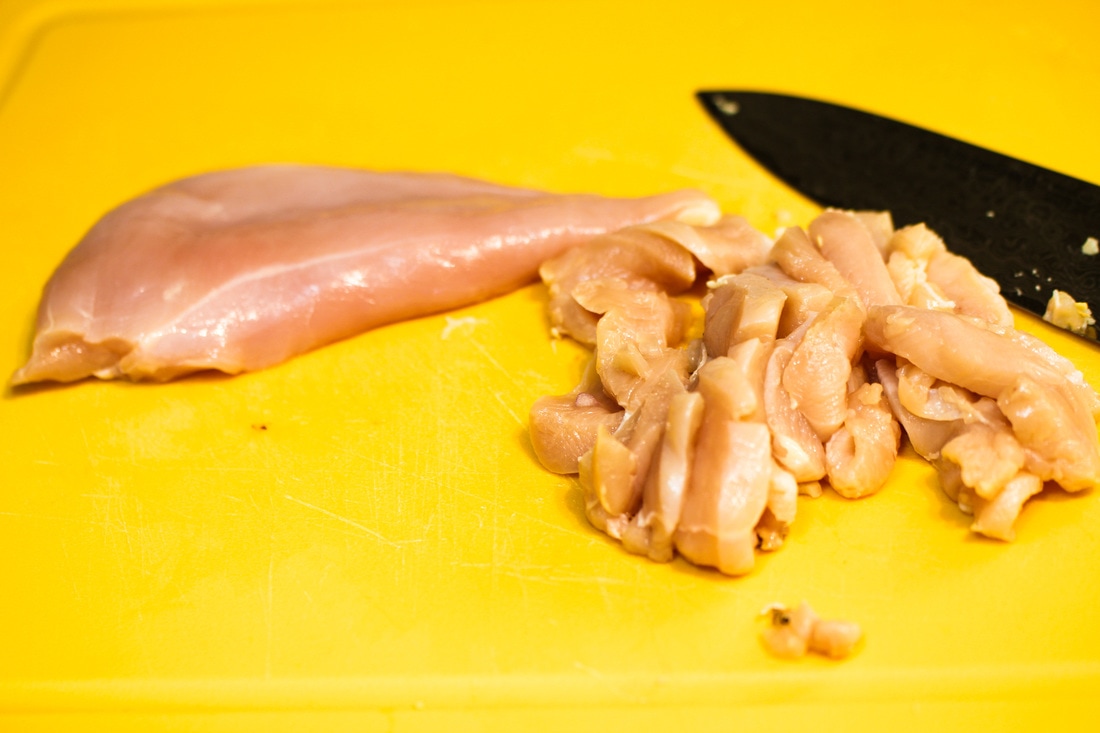
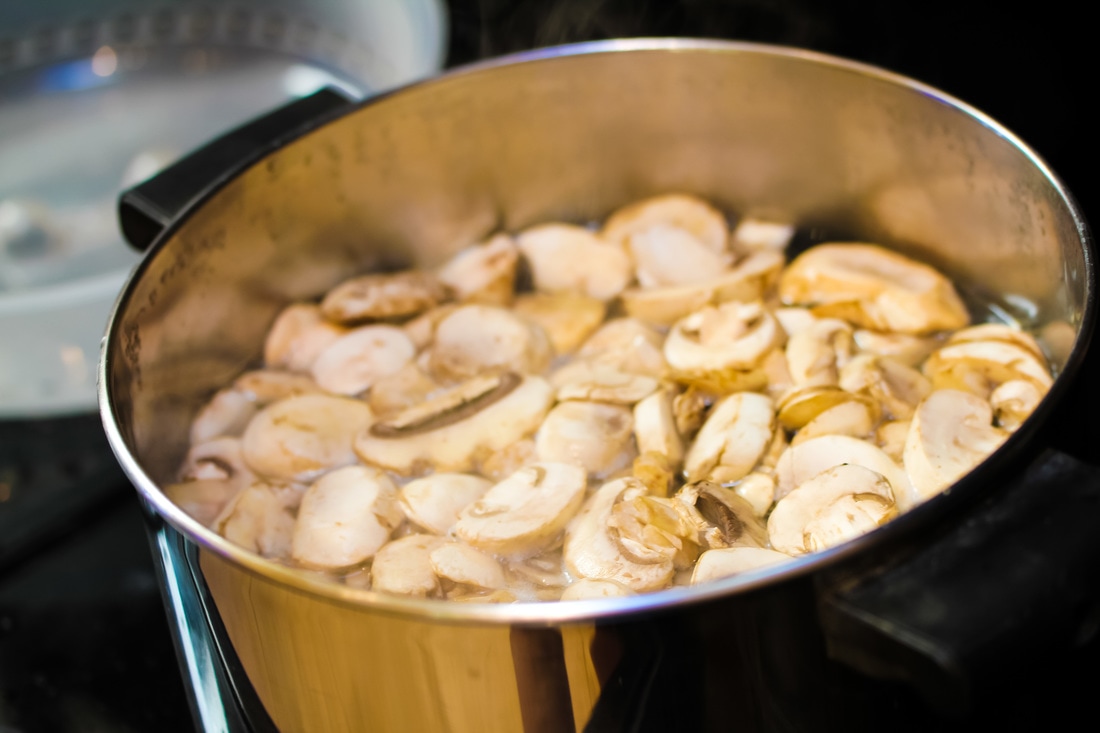
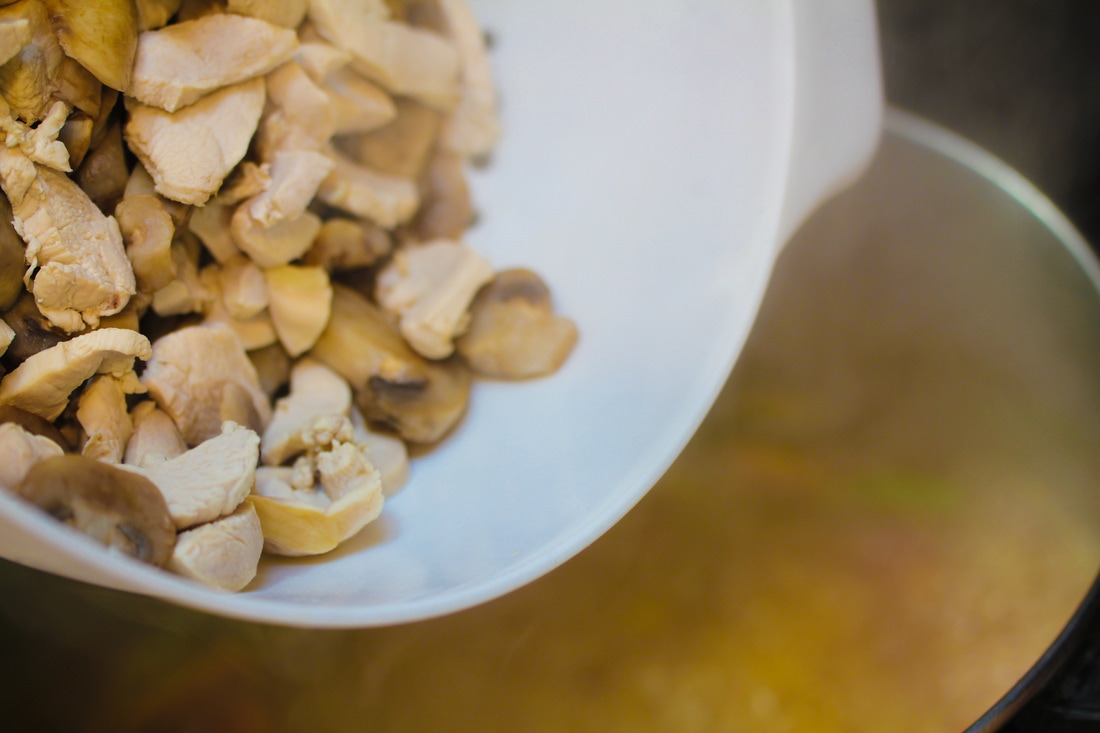
Thinly slice the chicken breast and rinse the mushrooms in water. Bring a large pan filled with water to boil, and put in the chicken and mushrooms. Boil at medium-high heat for 12-15 minutes. Discard the water.
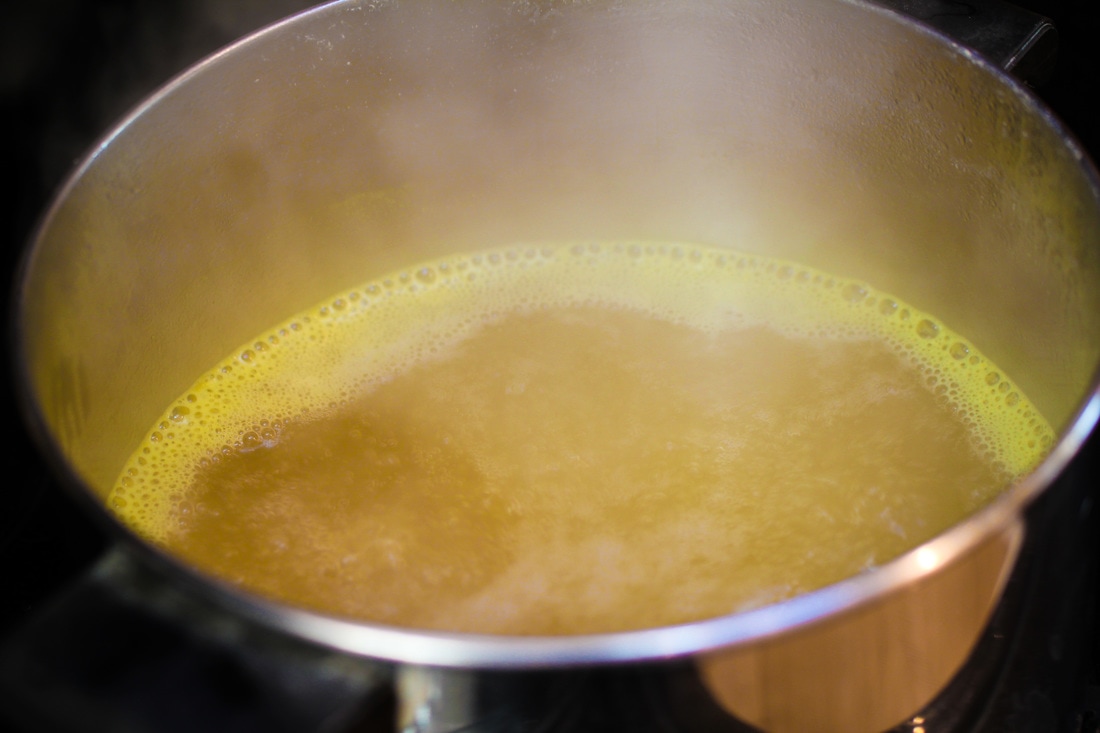
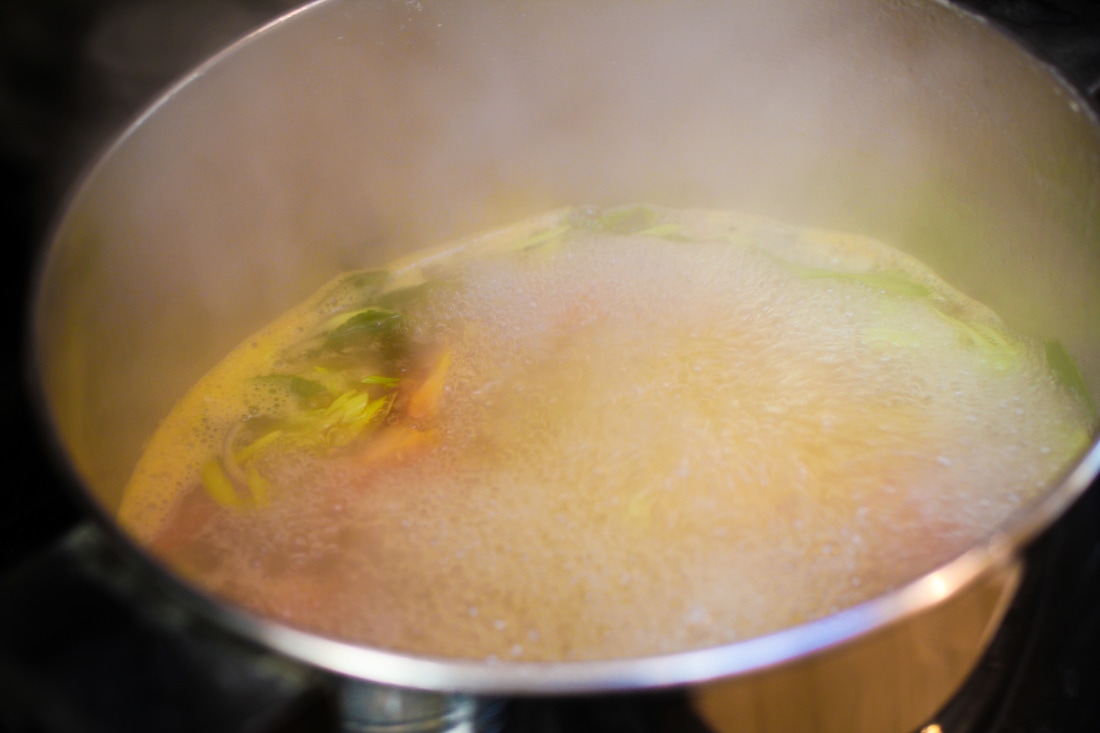
Pour the chicken broth into a large pan and bring to boil. Add the lime leaves, lemongrass, galangal, shallot, chilies and tomato. Boil for 6-8 minutes until the broth tastes herbal. if you’re using fresh ingredients, 4-5 minutes might be enough. Add a pinch of salt and then add mushrooms and chicken slices. Cook for another two minutes and then add fish sauce and lime juice. Stir and remove from stove. Taste and add more lime juice or fish sauce if needed. Add cilantro leaves. Serve hot!! 
1 Comment
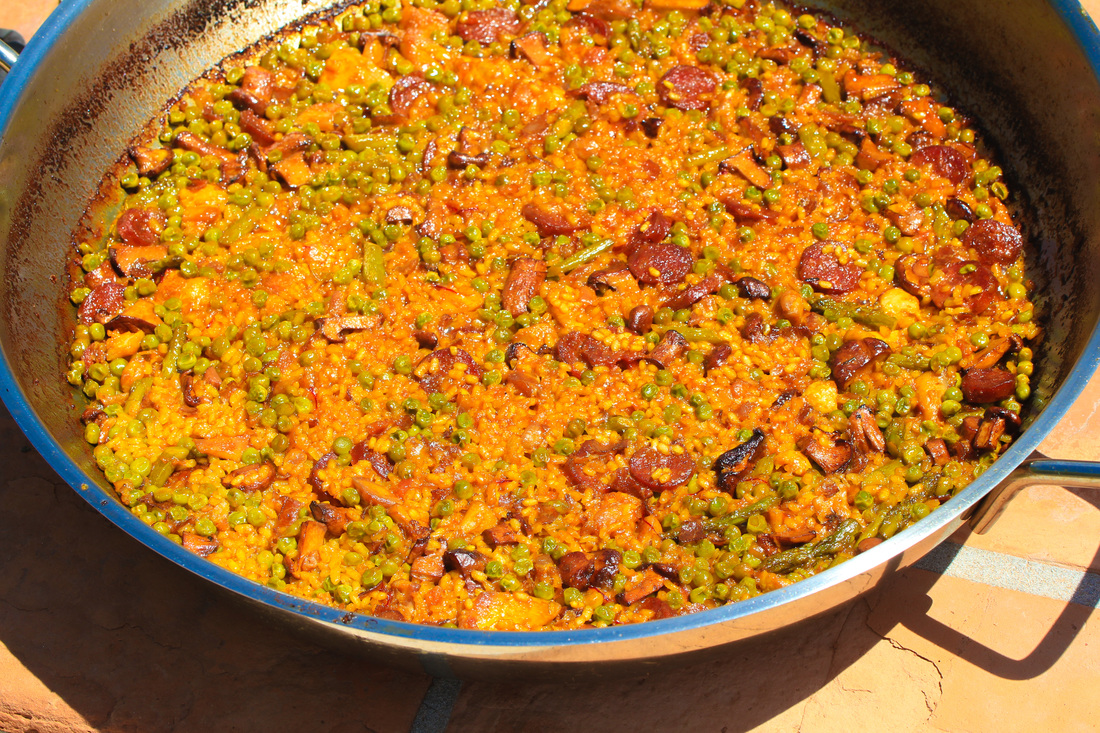
Paella is a fantastic dish that can be combined in so many different ways. There is a book from Phaidon filled with only Paella recipes. I prefer a seafood paella but I have noticed that not everybody like seafood. So here is my 3C Paella with chicken, chanterelles and chorizo. Chorizo can toughen up and become chewy when used in Paella but I really like the flavor so I throw it in there anyways. Just remove the casing and get a good Spanish brand and you should be okay.
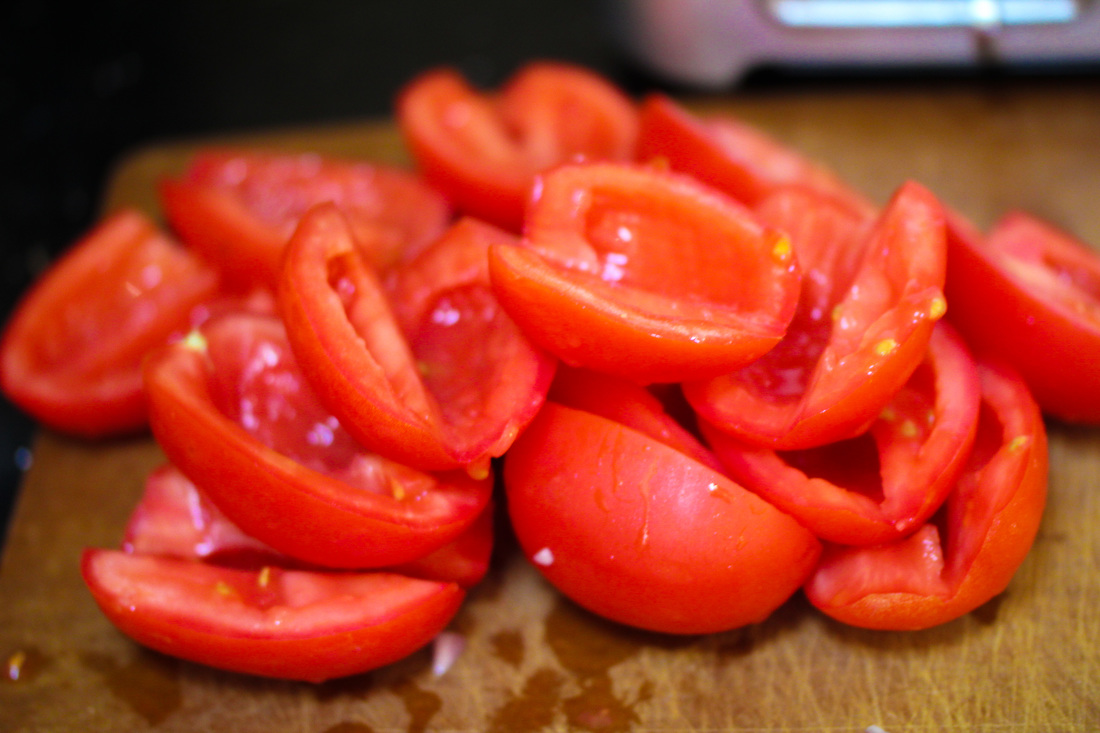
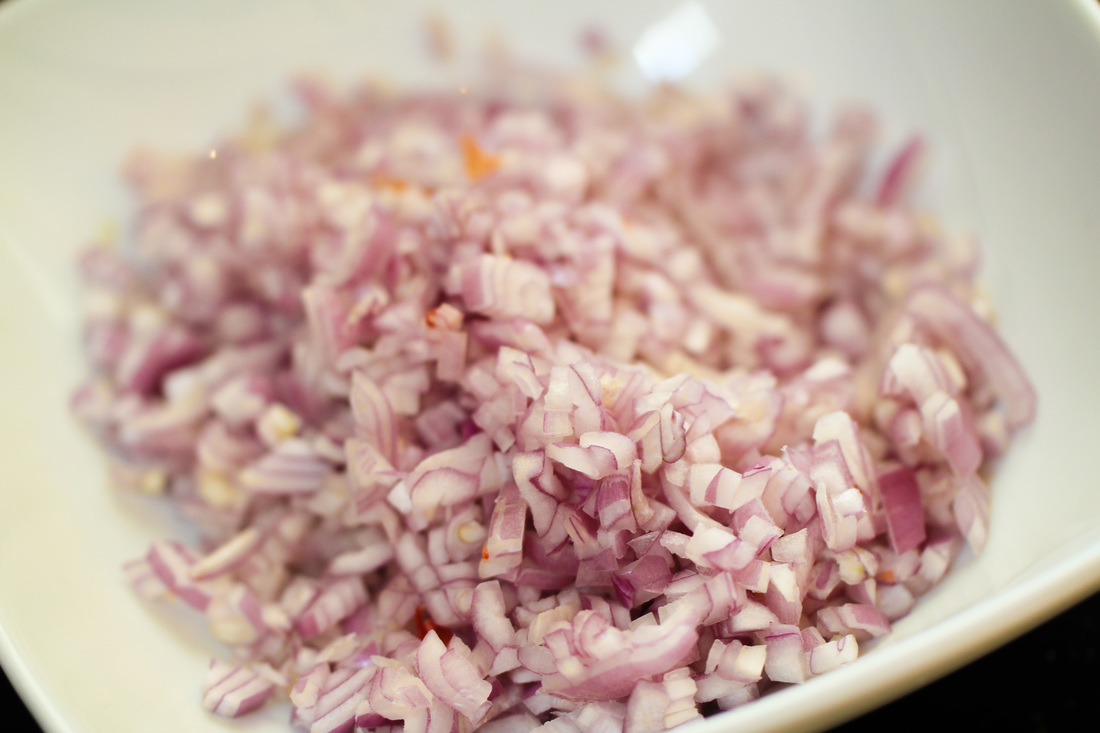
Start with the Sofrito. Cut the tomatoes in half. Scoop out the seeds. Finely chop the onions. If you can find Spanish onions that would be your best choice. If you cant, shallots is a good substitute.
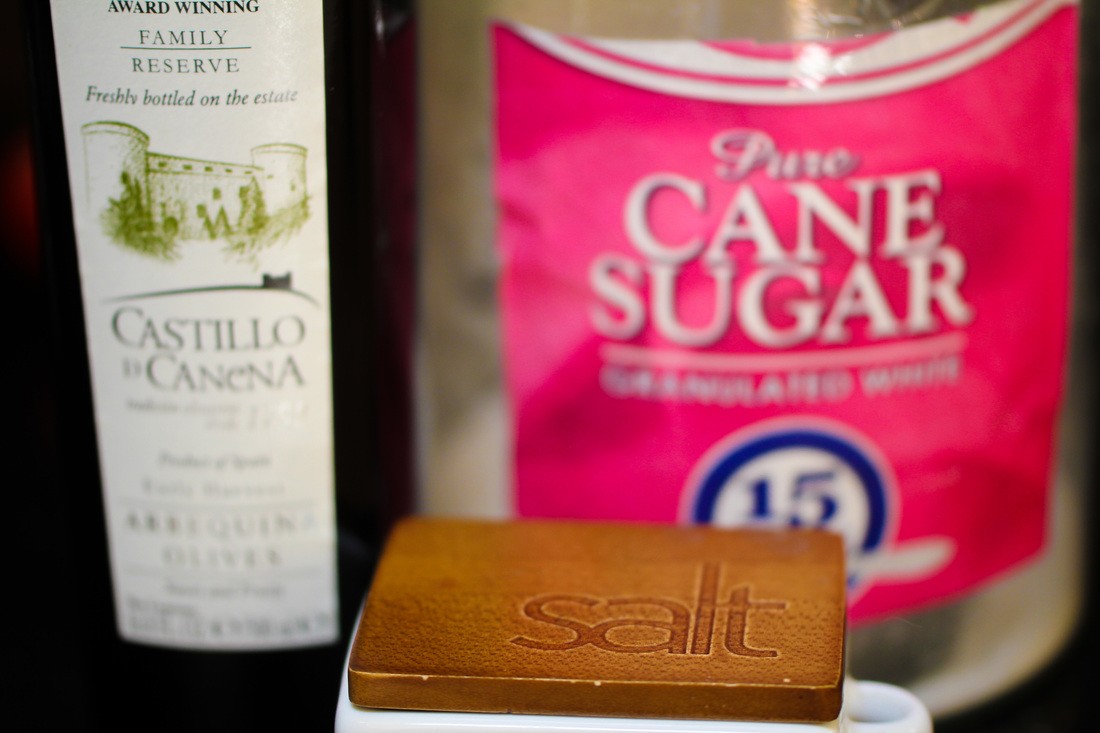
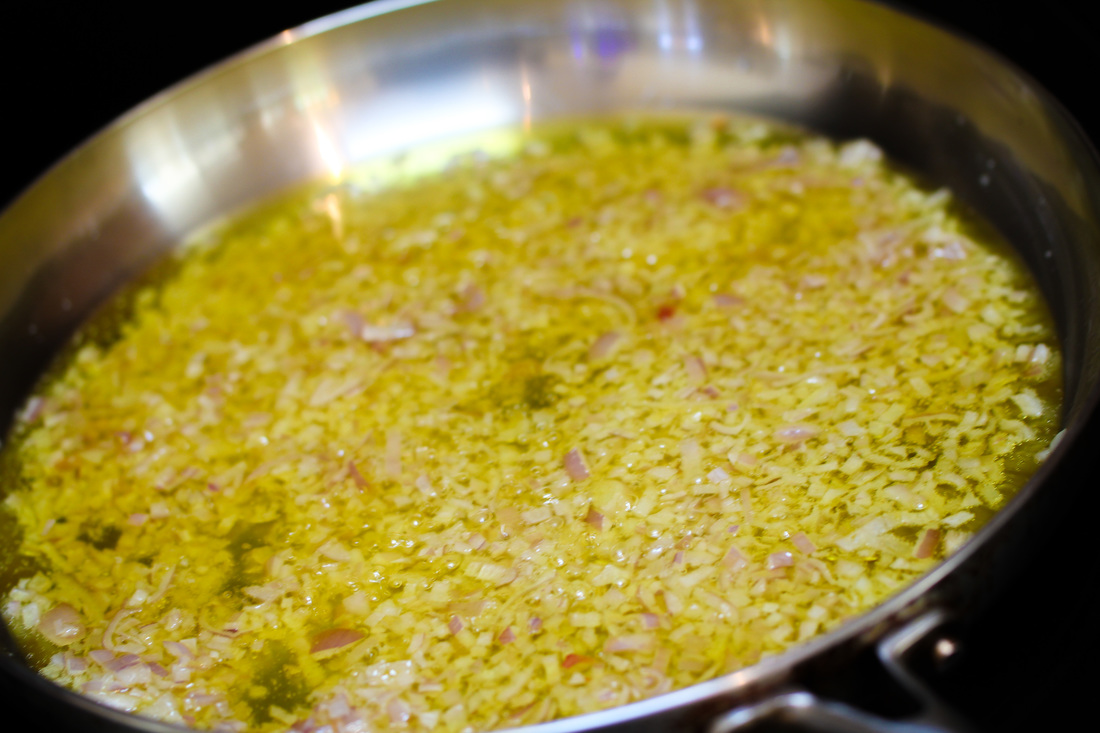
Place a grater over a large mixing bowl. Rub the open face of the tomatoes over the grater until the flesh is grated. Discard the skin. Watch your fingers and knuckles when you do this. Heat the oil in a saucepan on low-medium temperature. Add the onions, sugar and salt.
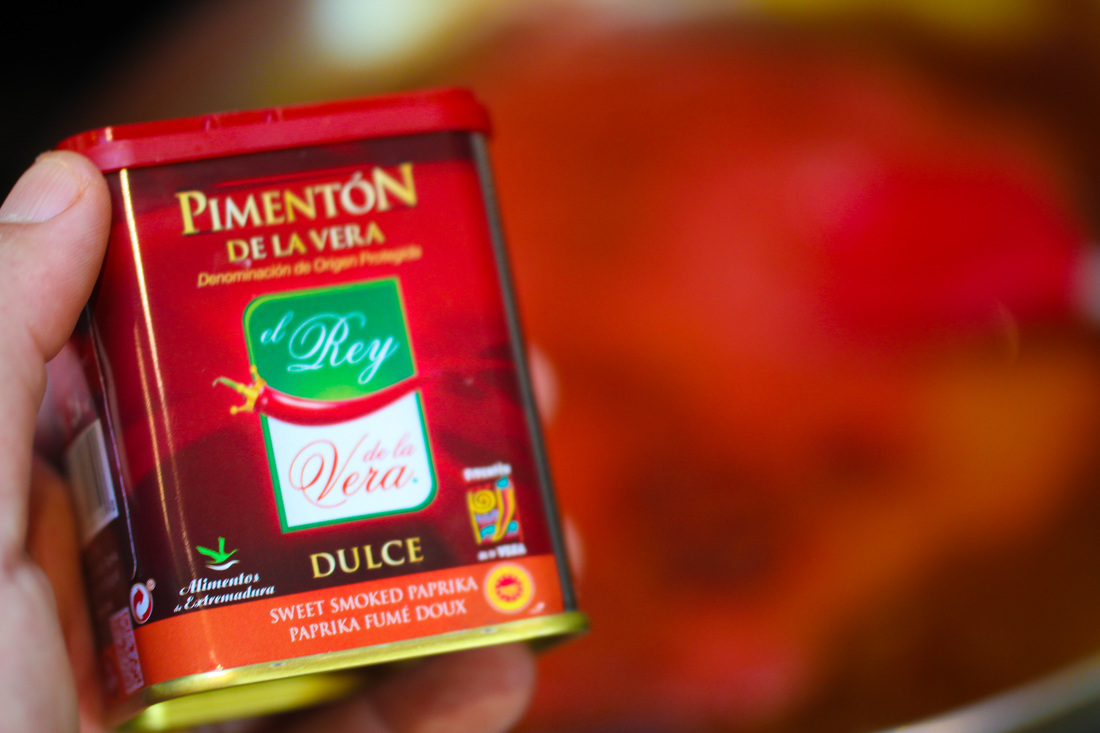
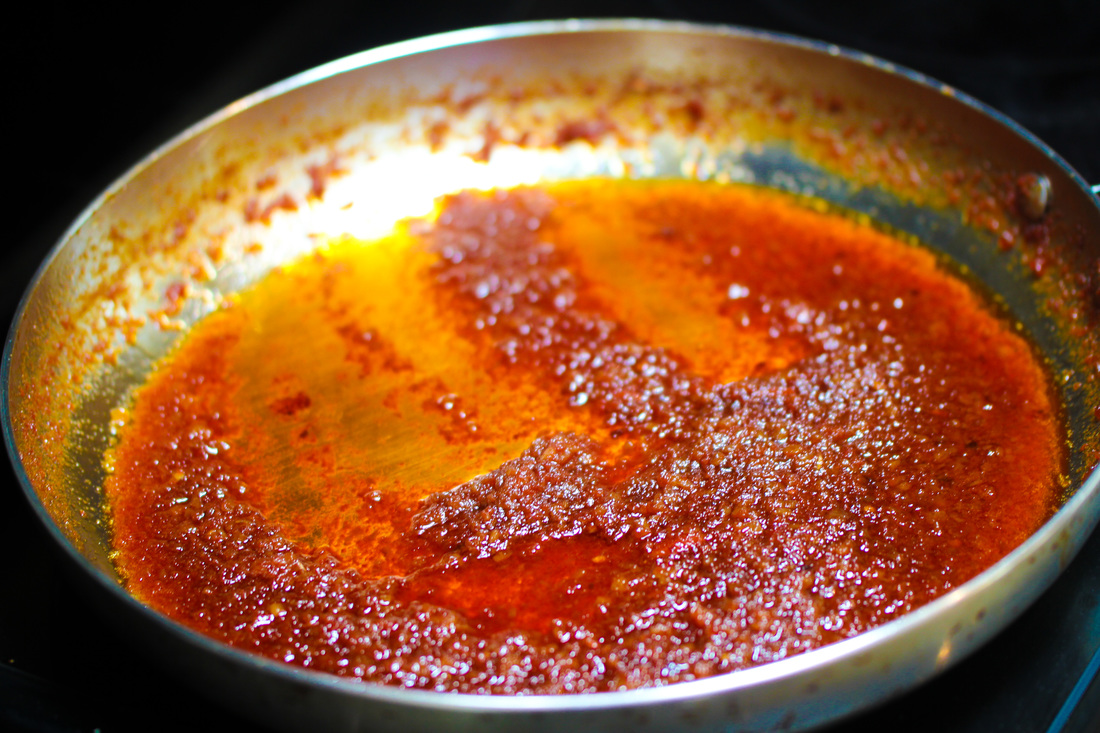
Cook, stirring frequently until the onions become soft and tender. The key to a good Sofrito lies in a good caramelization of the onions. Keep cooking until the onions turn brown, about 35-40 minutes. Add the sweet Spanish paprika (Pimenton), and stir. When thoroughly mixed , add the tomato puree. Cook for another 20 minutes. The Sofrito is ready when the tomato has turned deep-red and the oil is separated from the tomato-onion mix.
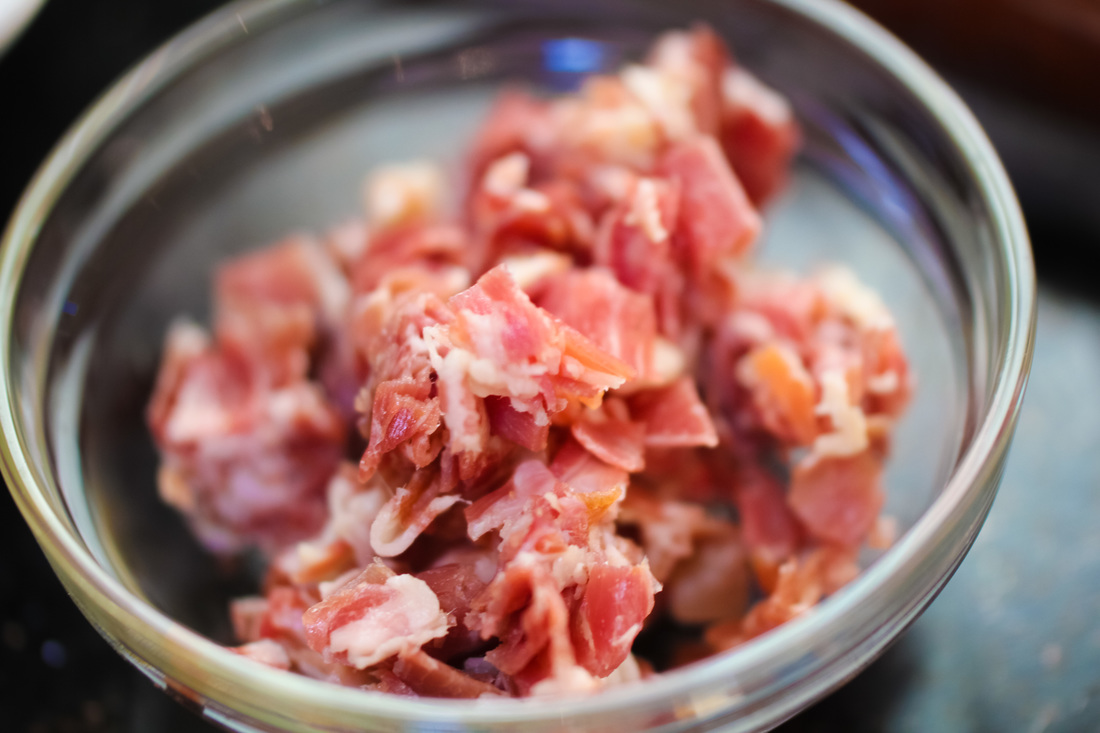
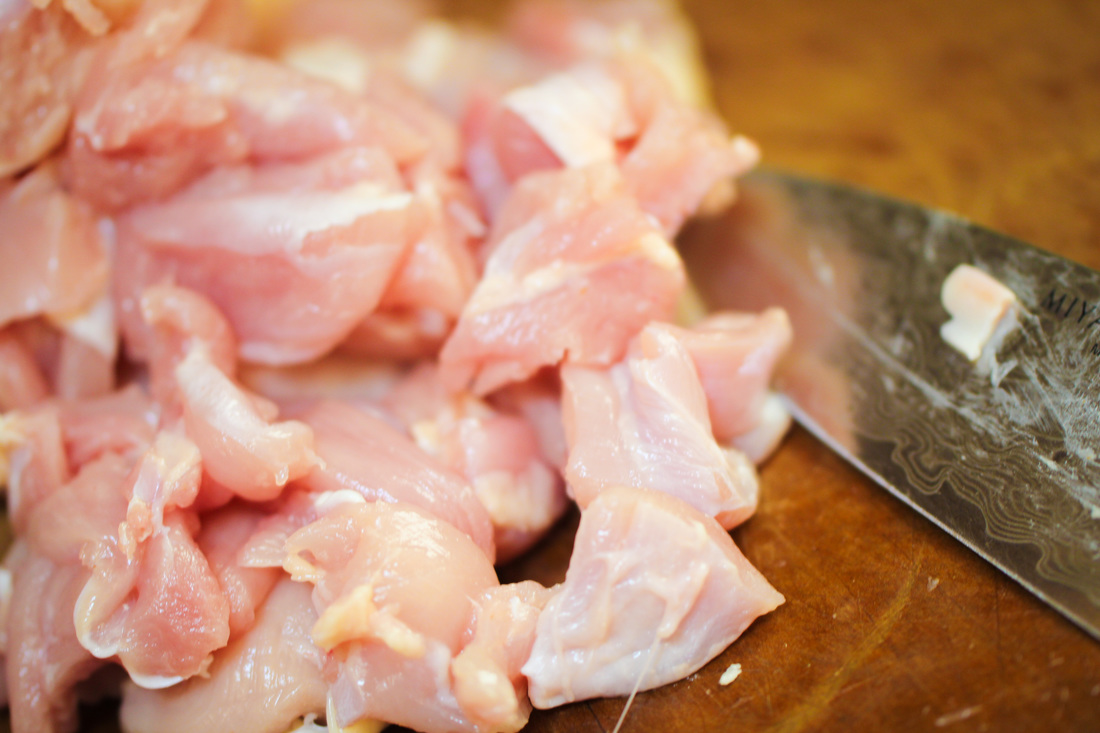
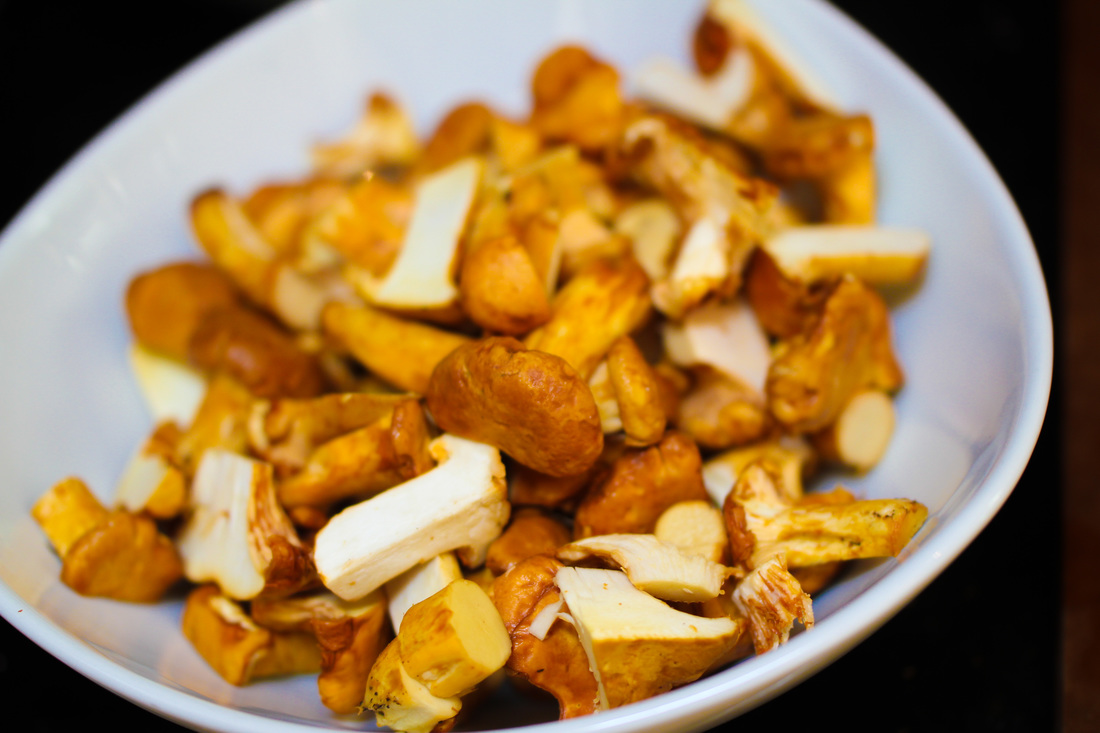
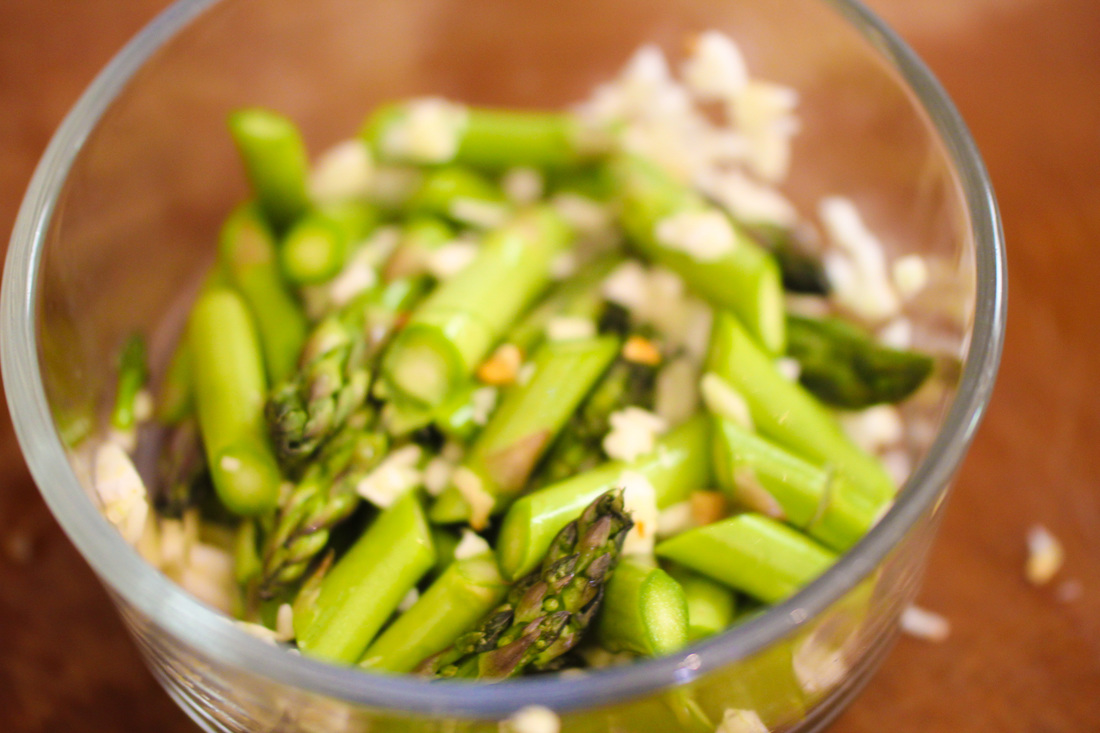
Now, prepare all the ingredients for the Paella. Chop the Jamon, slice the Chorizo, trim and cube the chicken, clean and half the chanterelles, trim and slice the asparagus, chop the garlic. 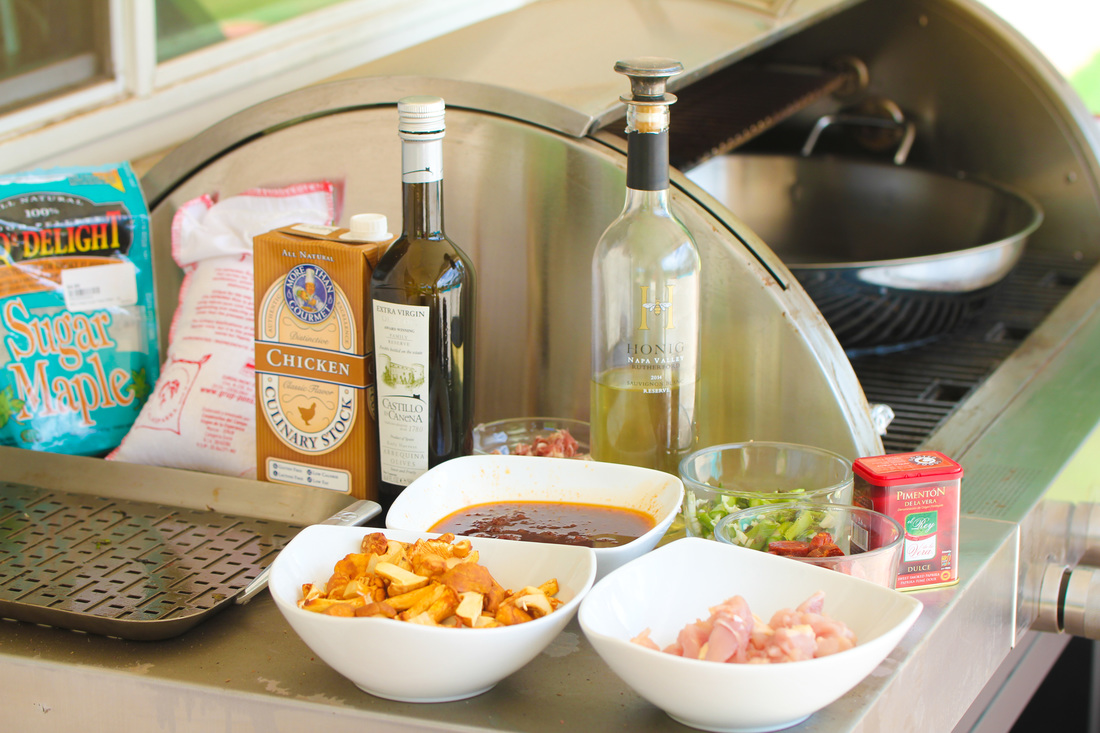 You can do this on a stove top, but I prefer to do it on the grill. I have a large Paella pan and it heats more even on the grill than when spanning several heating areas on the stove. Make sure that you have all the ingredients ready before you start the paella - there are several steps and timing is important. You don't want to overcook the ingredients.
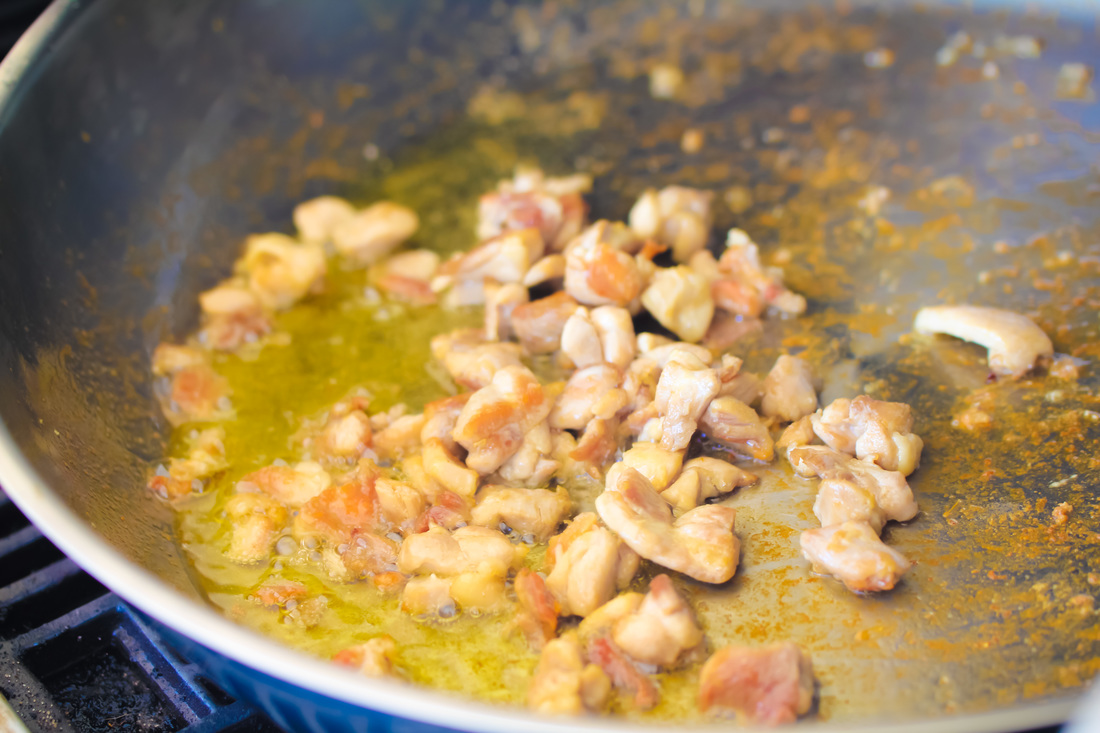
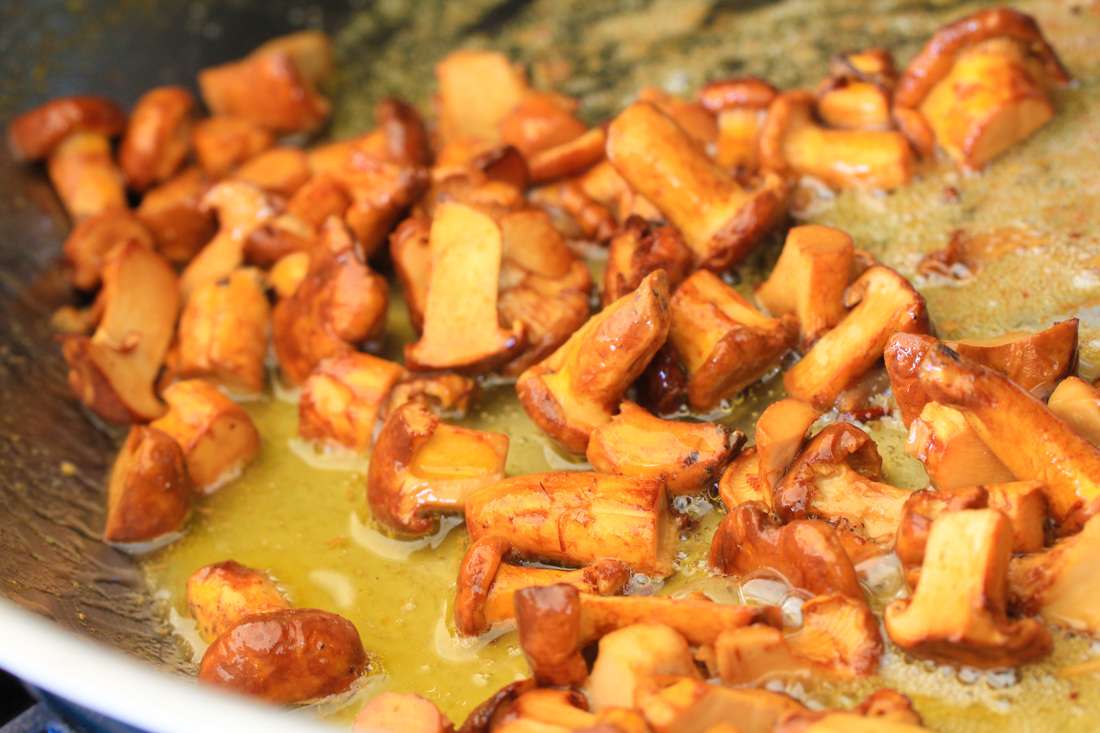
Heat the olive oil over high heat - this could take a while if you use the grill. Be patient and test with dripping some drops of water into the pan. When it sizzle, it is hot enough. Add the chicken and saute until it is brown on all sides. When they have a nice color - remove and set aside. Add the chanterelles to the pan and saute until they are golden. This will take about 3 minutes.
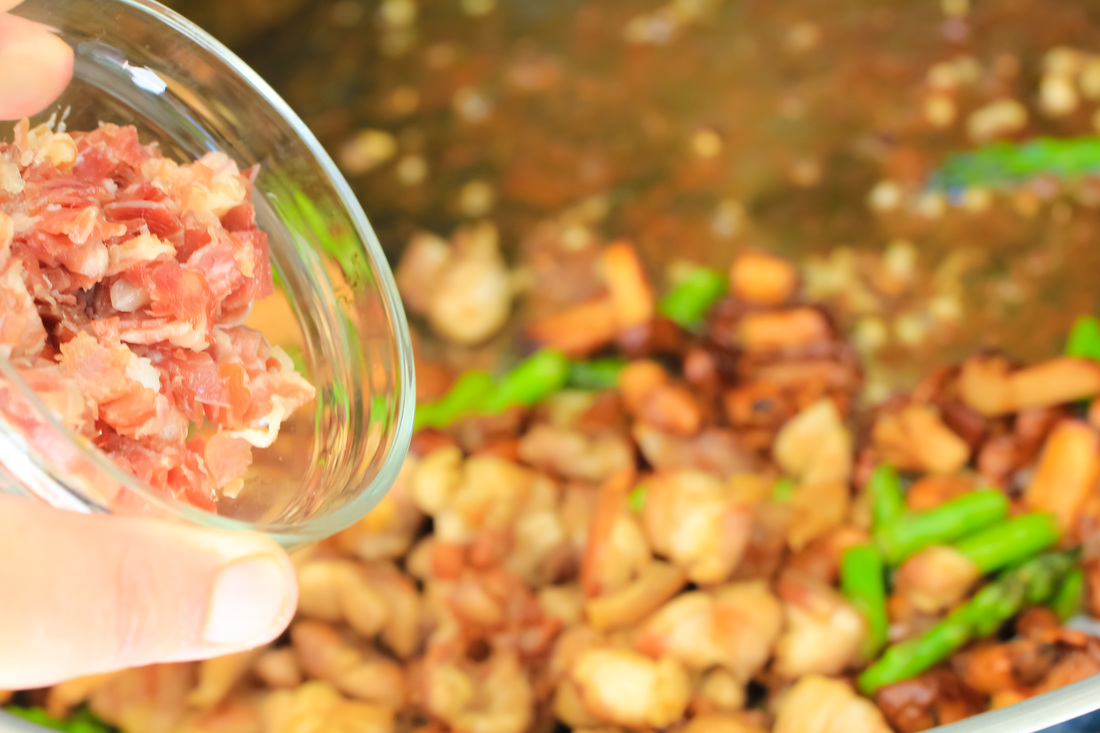
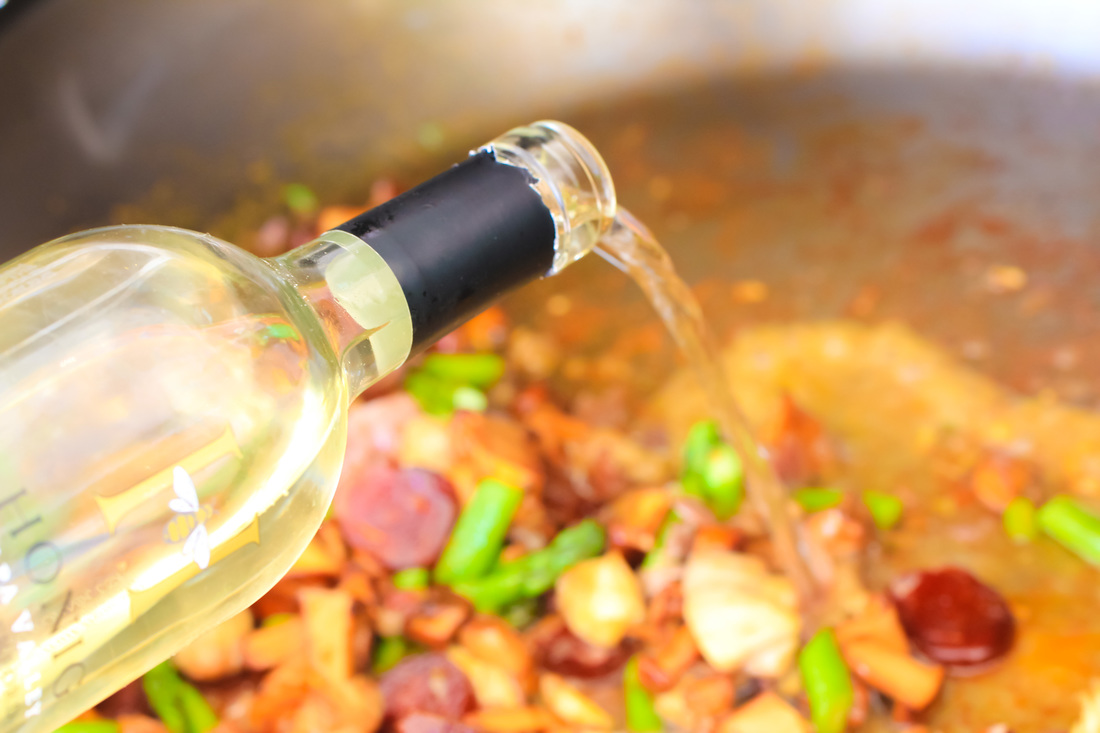
.Add the ham, the asparagus, the garlic, and the chorizo to the pan. Cook for another 2-3 minutes. Add the chicken back to the pan. Deglaze the pan by adding the wine and stir. Reduce until half of the wine has evaporated.
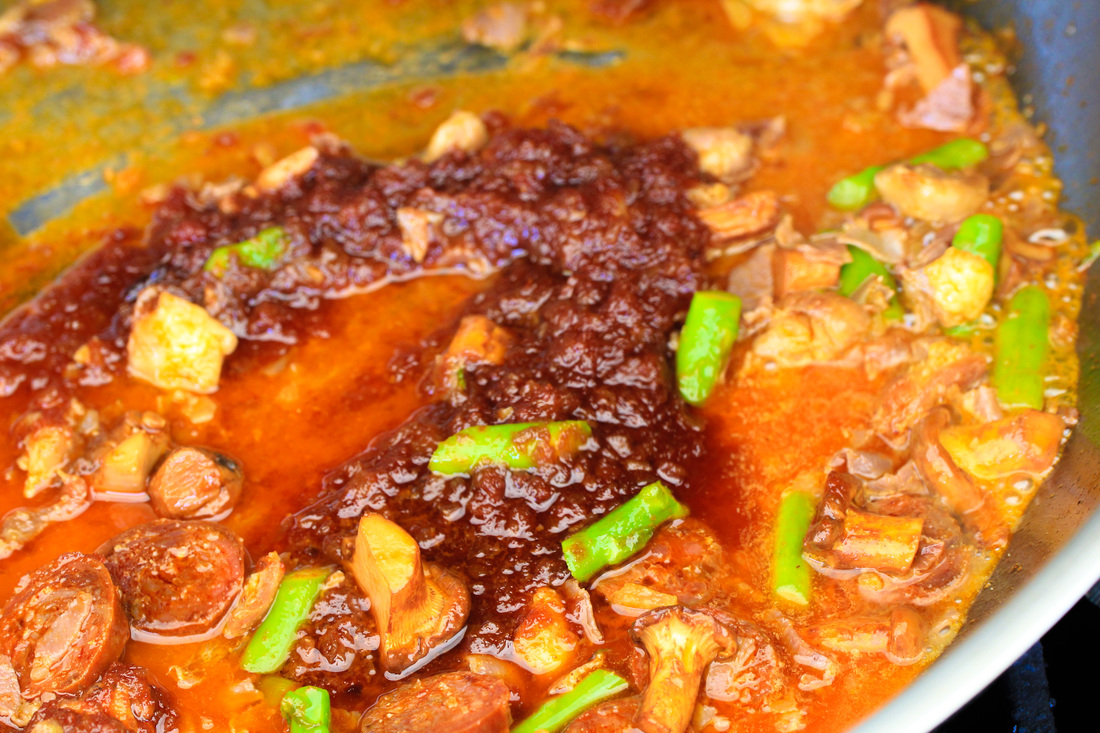
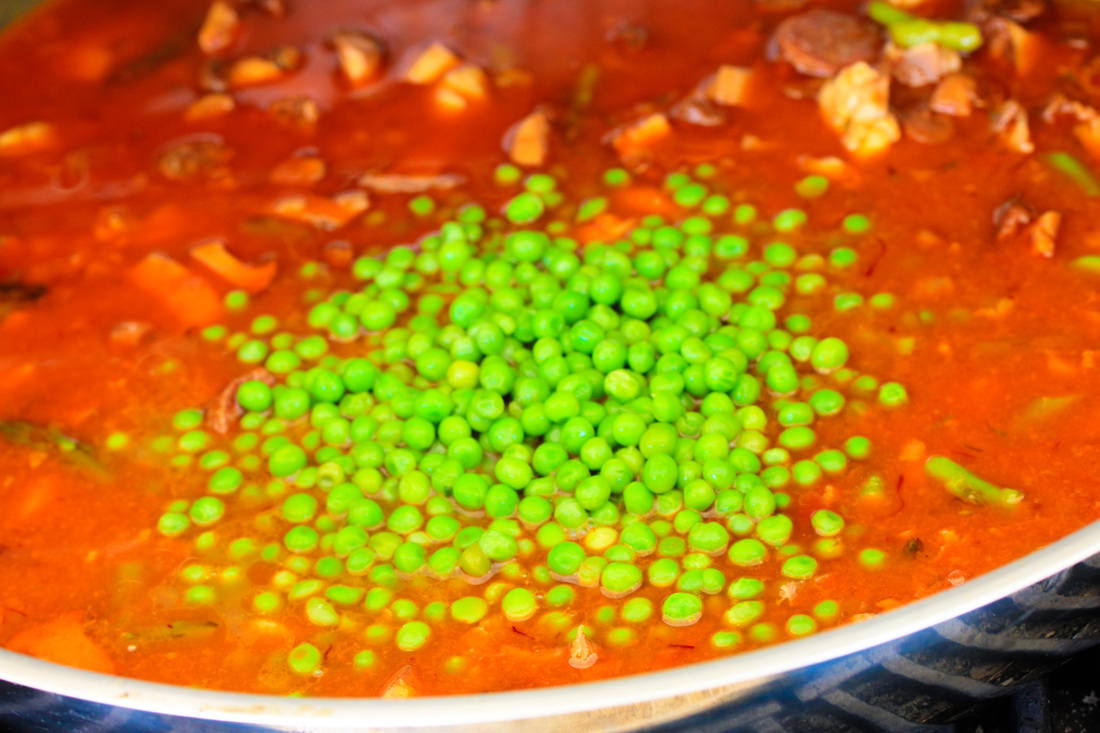
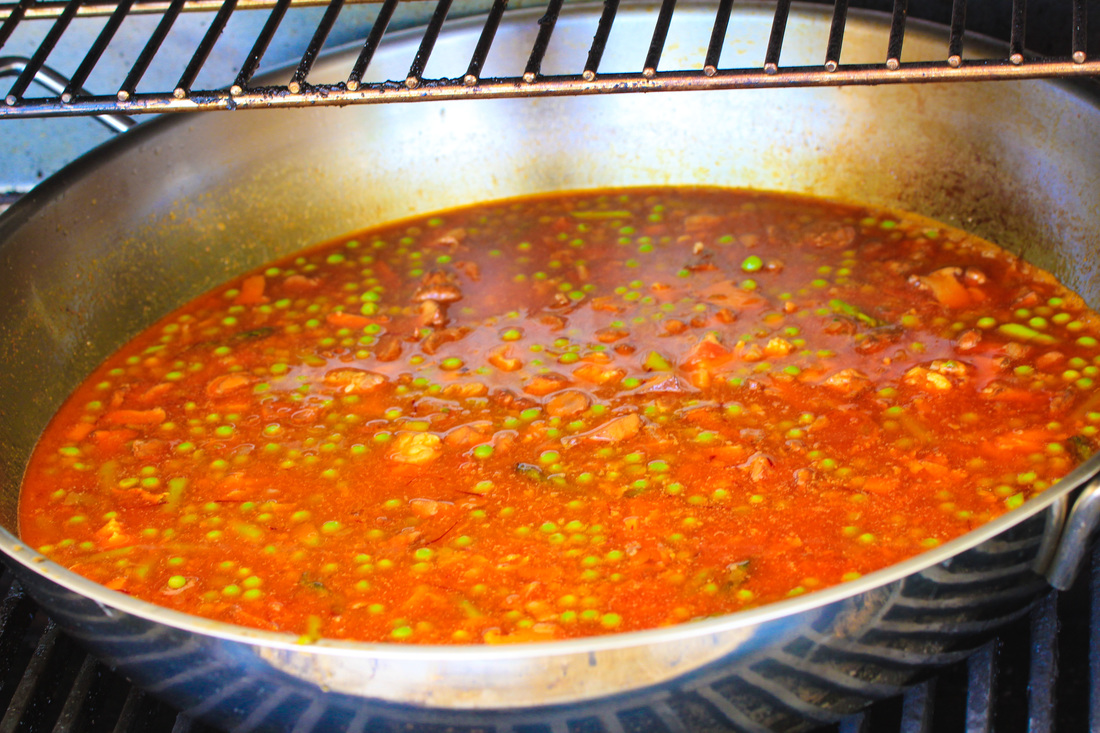
Add the Sofrito and cook for another 3 minutes. Make sure that you stir constantly. Add the peas. Pour in the chicken stock.
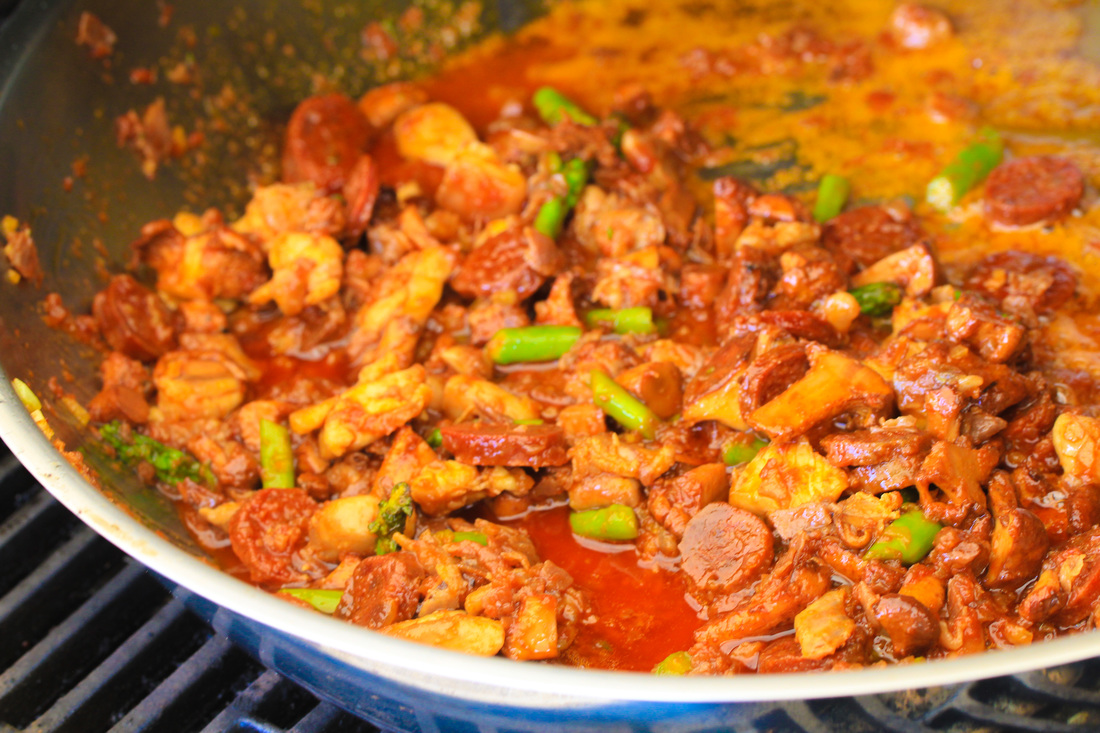
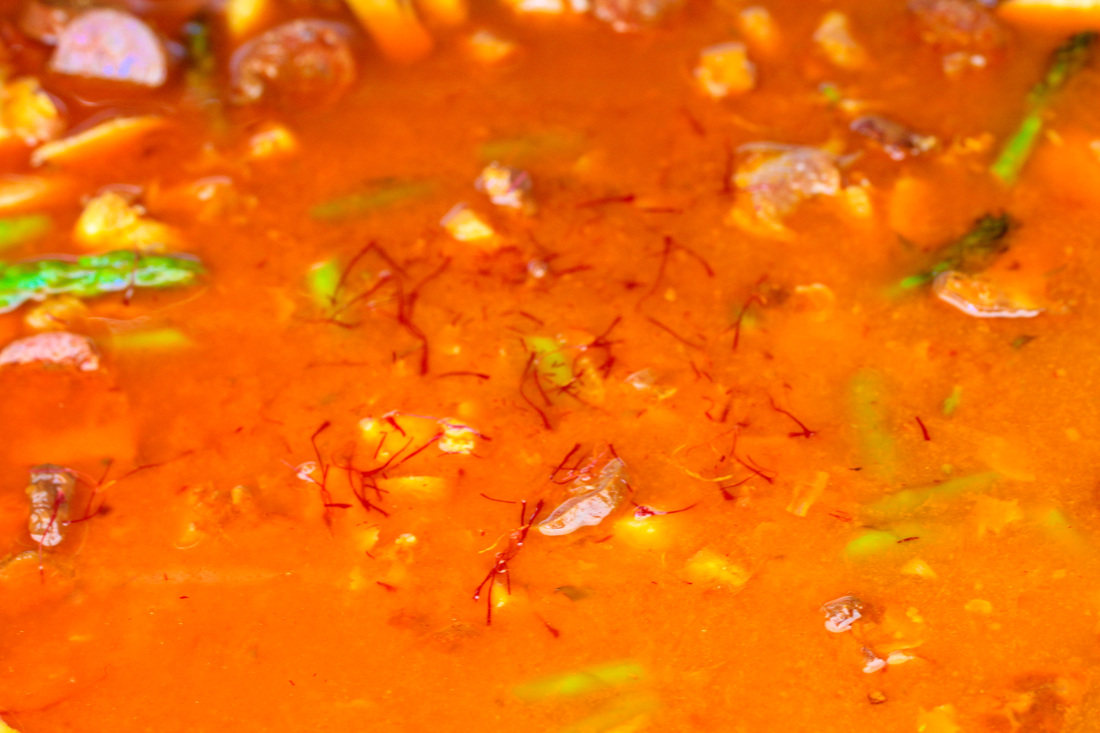
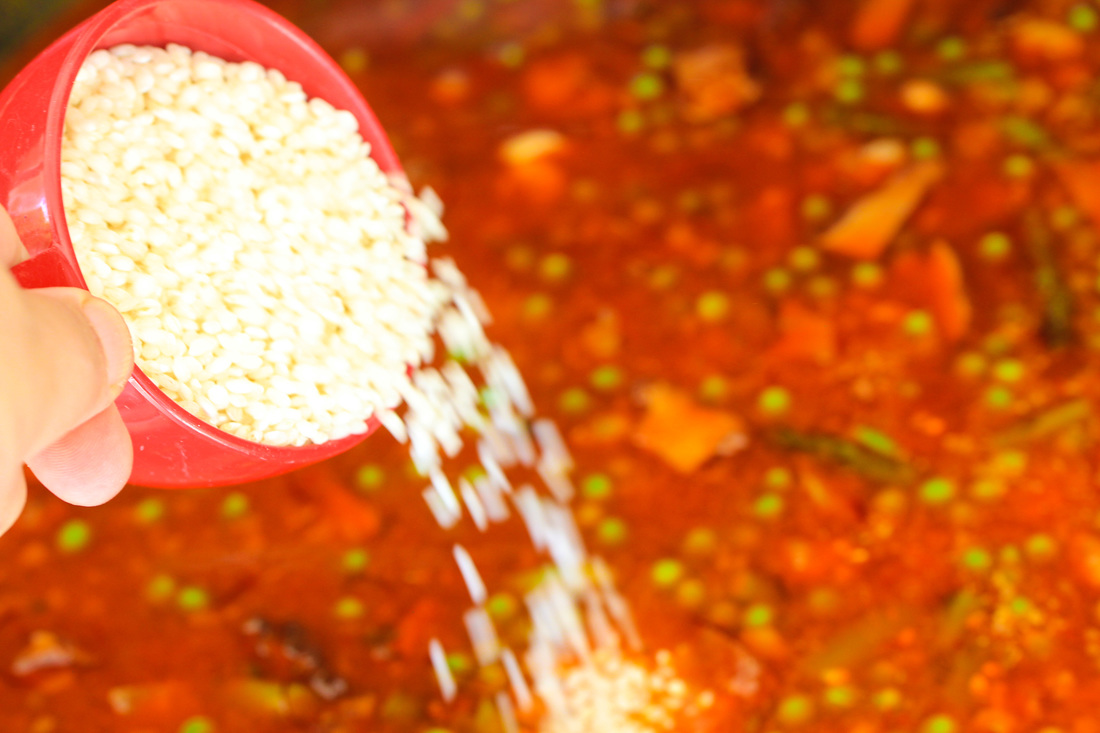
Add the saffron thread. They are best if you toast them in some aluminum foil first and then crush them. This will release even more flavors. Add the rice - make sure that you distribute it evenly in the pan. Cook for another five minutes - stirring every 30 seconds or so. You will see the rice floating to the surface when it starts absorbing the chicken stock.
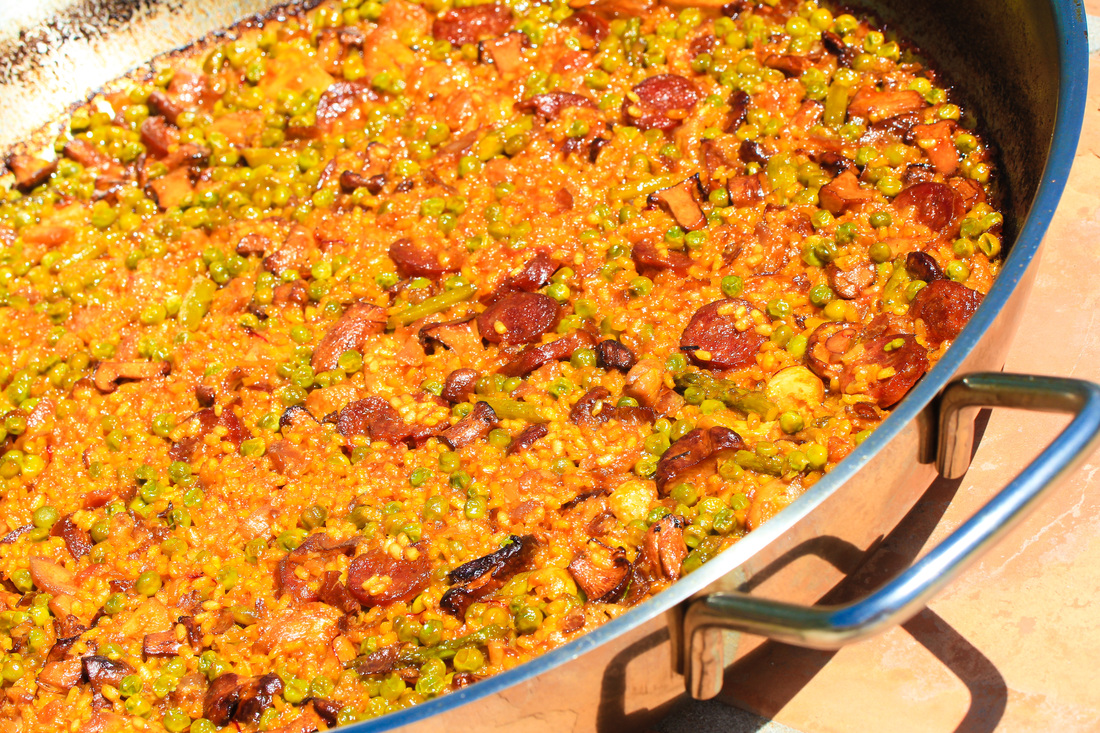
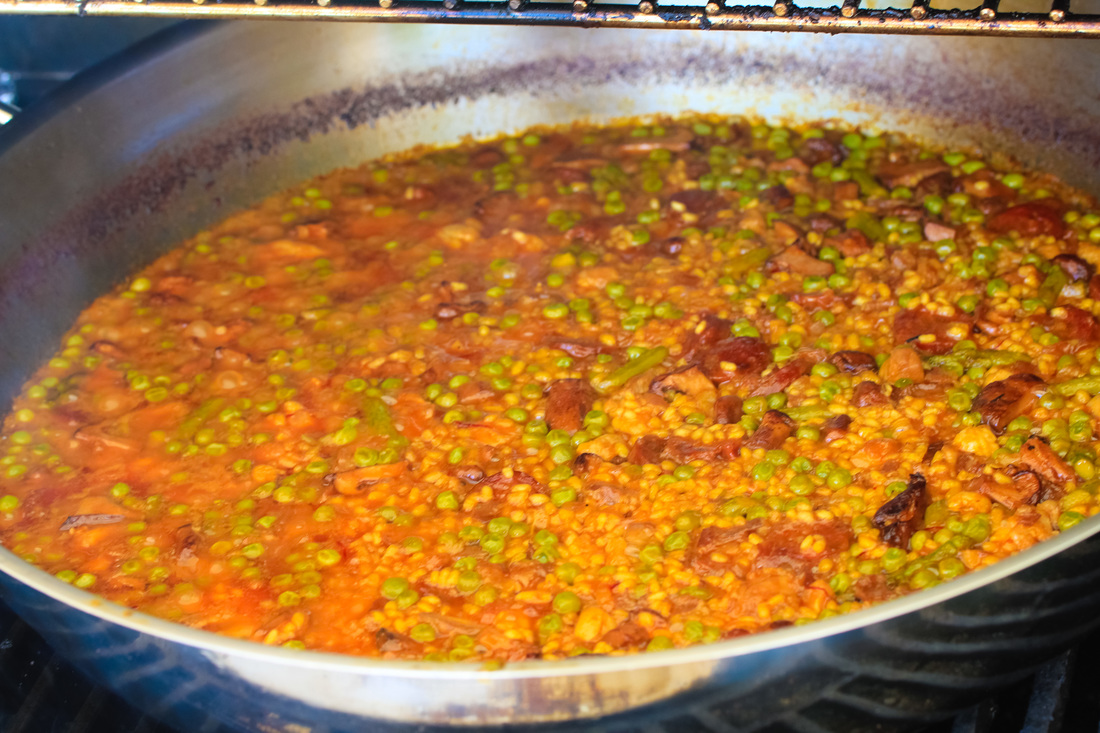
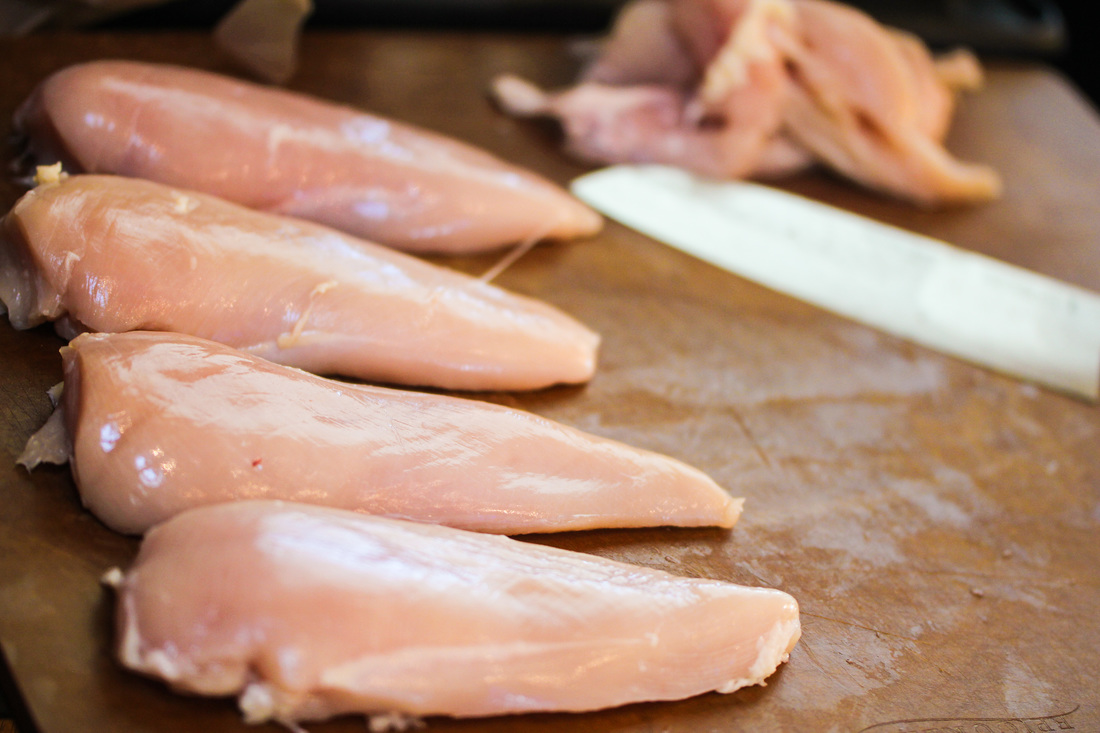
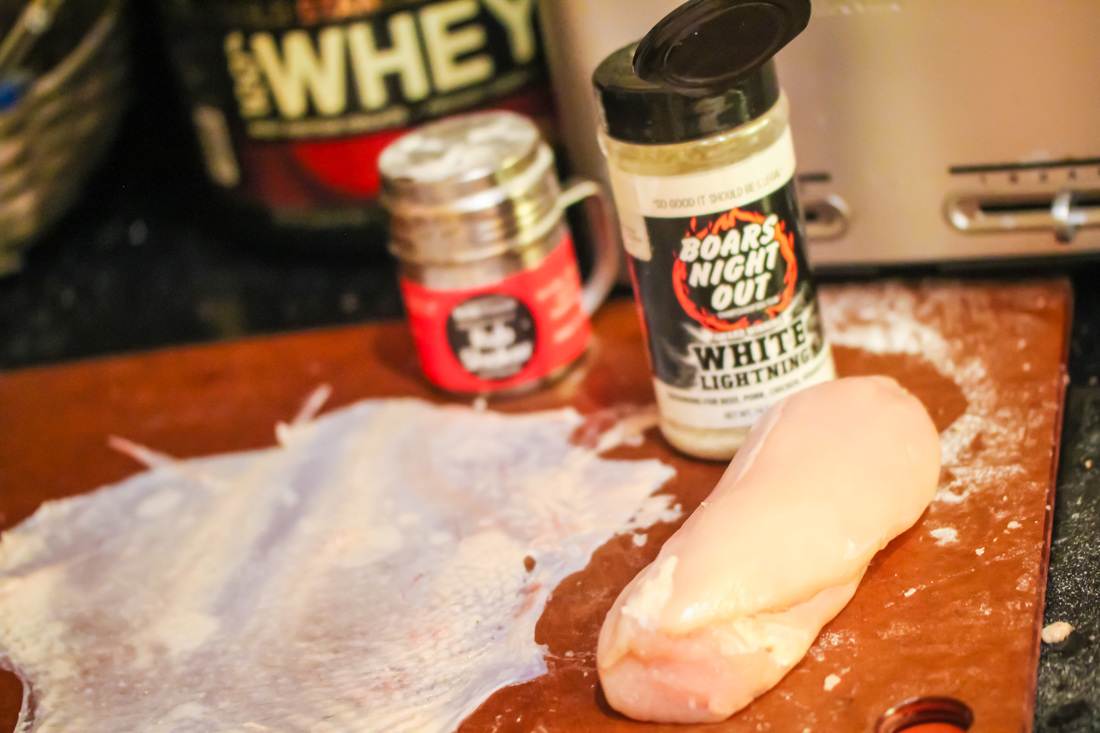
Reduce the heat to low and cook at a slow boil until all the liquid is absorbed. This normally takes 10-15 minutes. This is important: DO NOT put your finger or spoon into the paella during this part. If you do, the rice will cook unevenly. It is really hard to resist but if you want a great paella - don't!! On the two pictures above you can see the rice absorbing the liquid slowly. 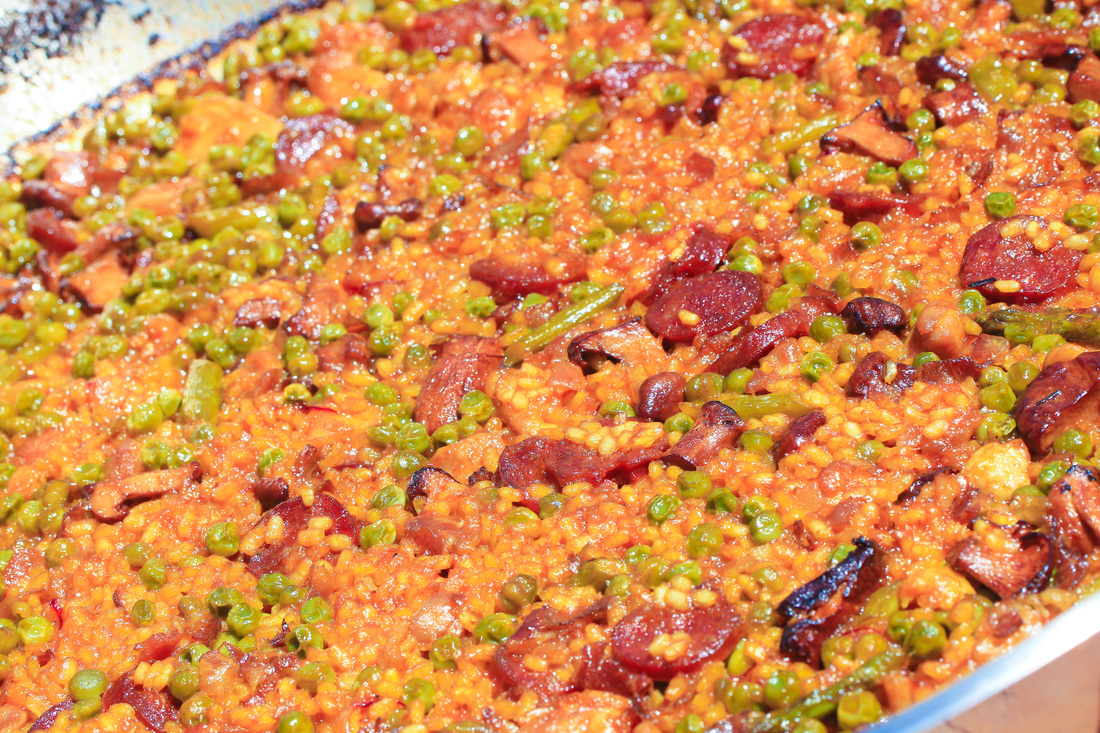 Remove from grill and let the paella sit for 3-4 minutes There should be a nice shine to the paella and all the liquid should be absorbed. The rice in the bottom should be crisp and crunchy and the rice on the top should be creamy and smooth. The great thing about paella is that if done correct - you will have rice with different textures that add a nice touch to the dish. Serve immediately!! Another great thing about paellas is that it is easy to switch out ingredients and you will get a different kind of paella. Instead of chicken stock - use fishstock and instead of chicken and chorizo, use shrimp and mussels and you have a great seafood paella. Experiment and enjoy - this is a great base recipe. 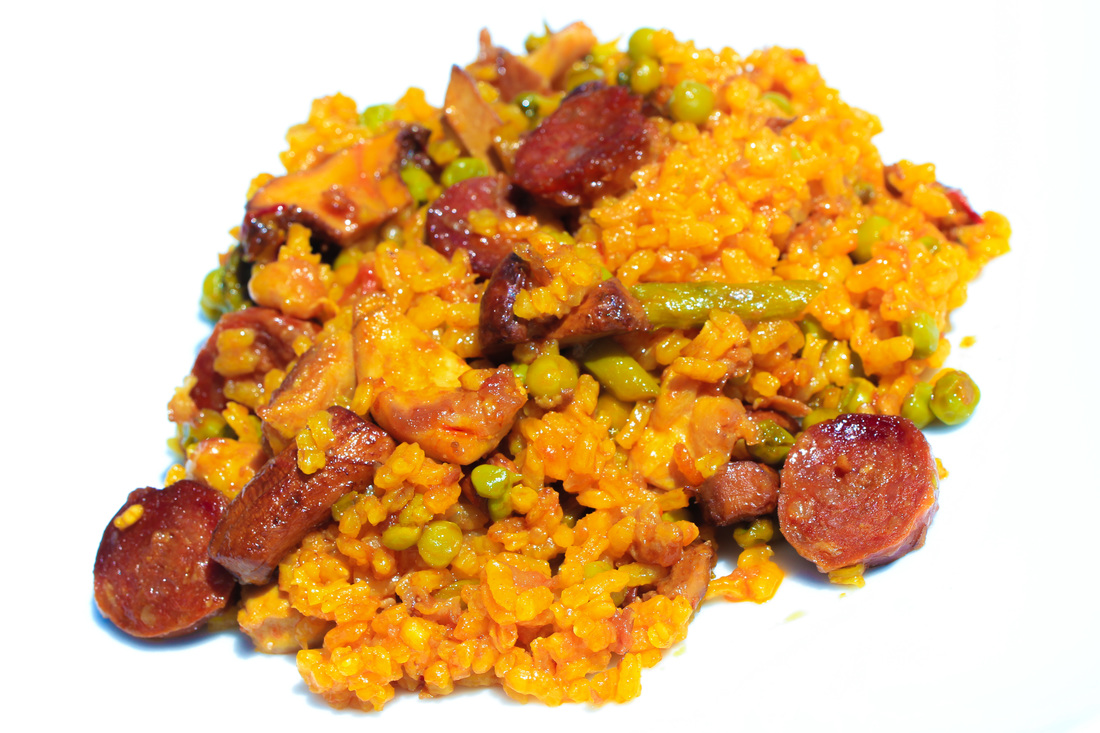 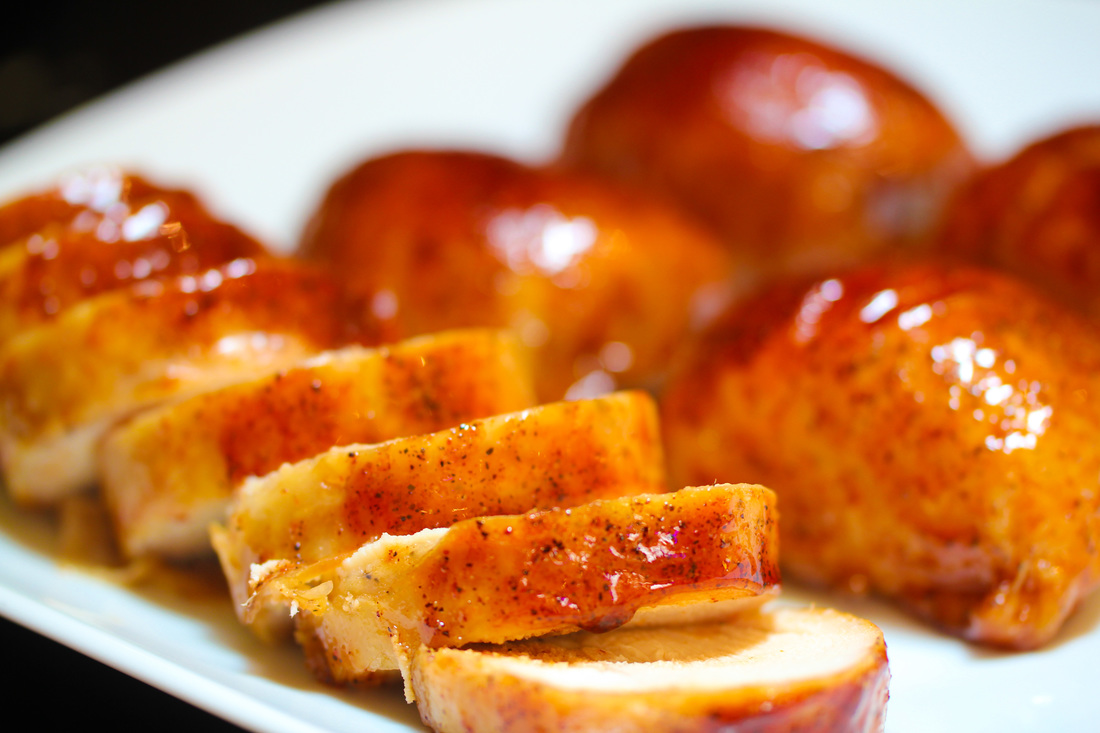 Ingredients: Skinless Chicken breast Whole chickens Your favorite chicken BBQ rub Butter - tons of butter RM Transglutaminase - I use Moo Gloo Dipping sauce - 1/3 BBQ Sauce 1/3 Honey 1/3 Apple juice Real men don't eat sushi - I remember this slogan from an old Chevy commercial back in my native Sweden. I happen to love sushi - but if you want to make something more meaty - well, maybe you should try Smoked Chicken Rolls. Moist and flavorful rolls of chicken wrapped in chicken skin. Too conduct this little neat trick you will need Meat Glue - Transglutaminase. Transglutaminase is an enzyme that catalyzes the formation of an isopeptide bond between a free amine group (e.g., protein- or peptide-bound lysine) and the acyl group at the end of the side chain of protein- or peptide-bound glutamine. In plain English - you can glue different cuts of meat together without any strange flavors.
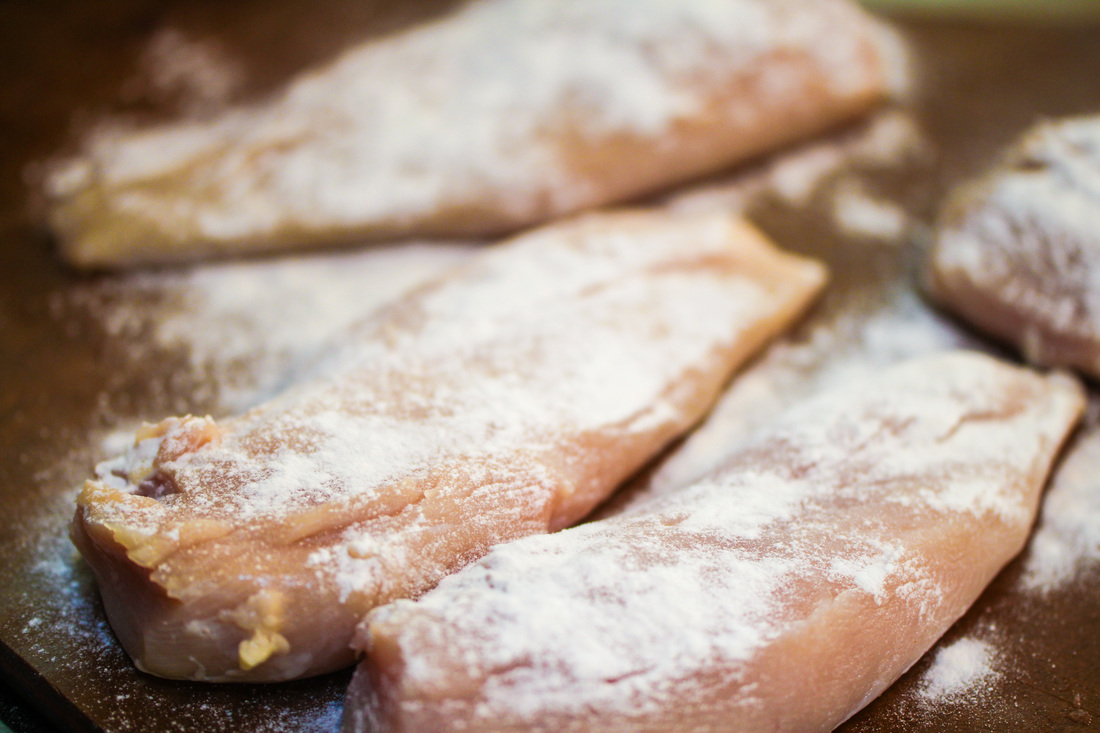
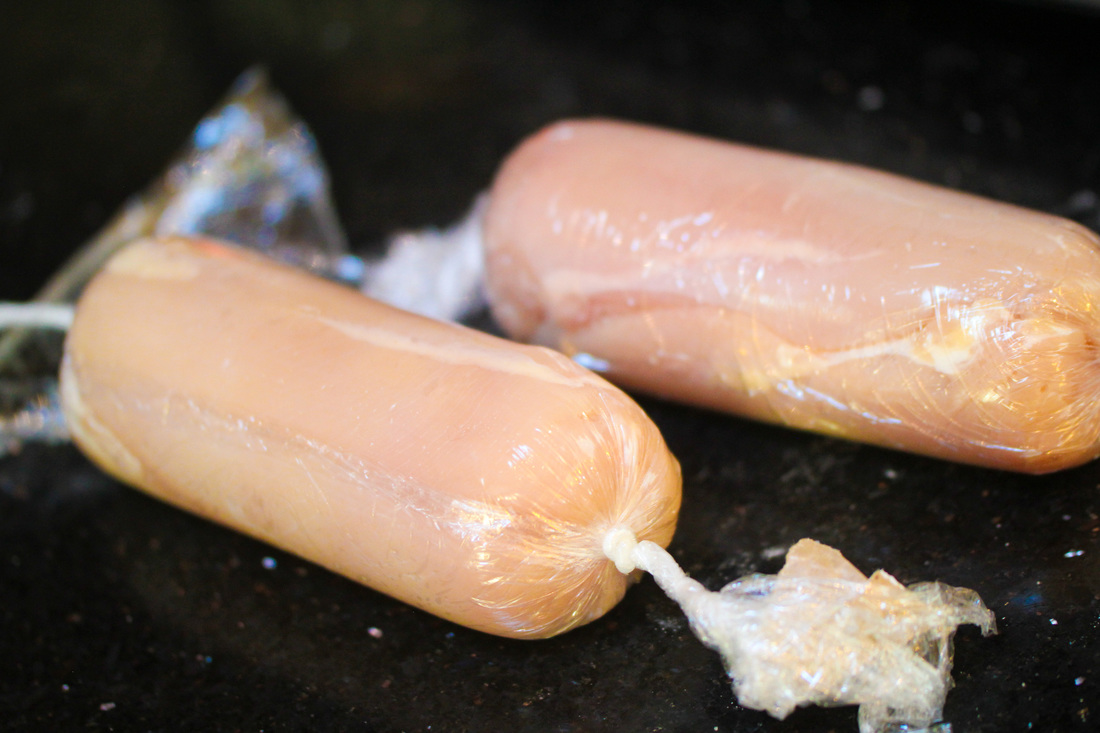
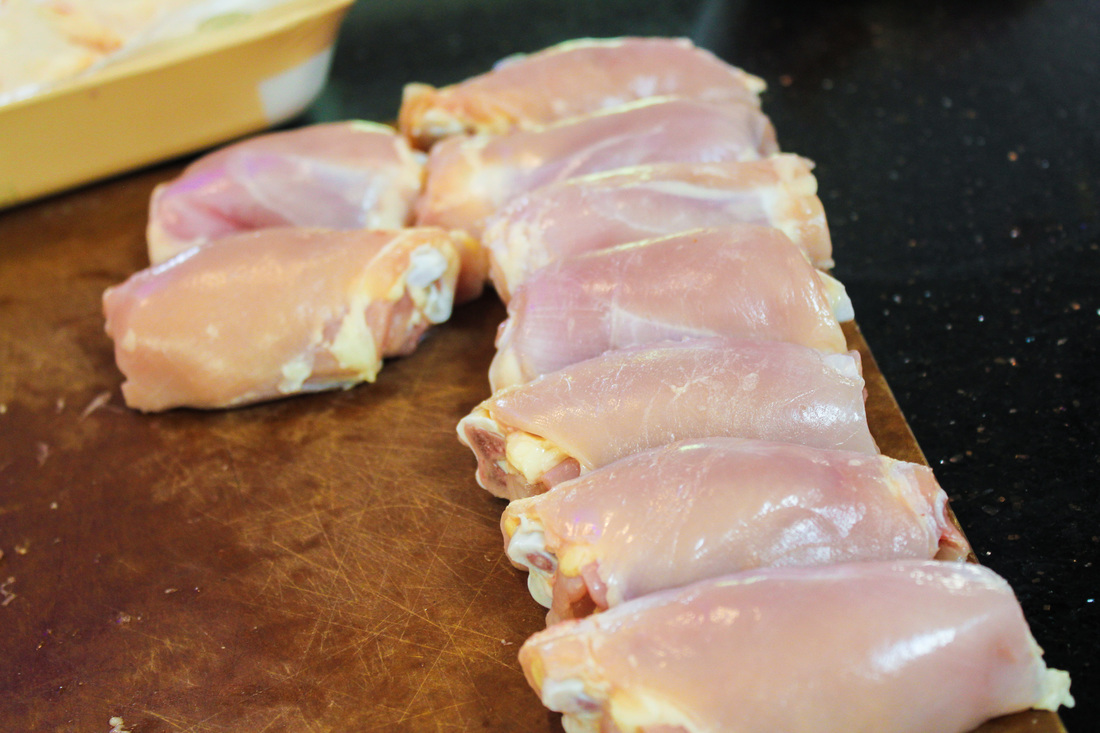
Start with trimming the chicken breast so that they are similar in size. Sprinkle richly on the sides you will connect with each other with Meat Glue. Place the chicken breast opposite each other - so the thin end in one breast connects with the wider end on the other breast. Roll them up so they get a nice log shape in some plastic wrap and keep in refrigerator for at least 8 hours. That is enough time for the meat glue to connect the tissues.
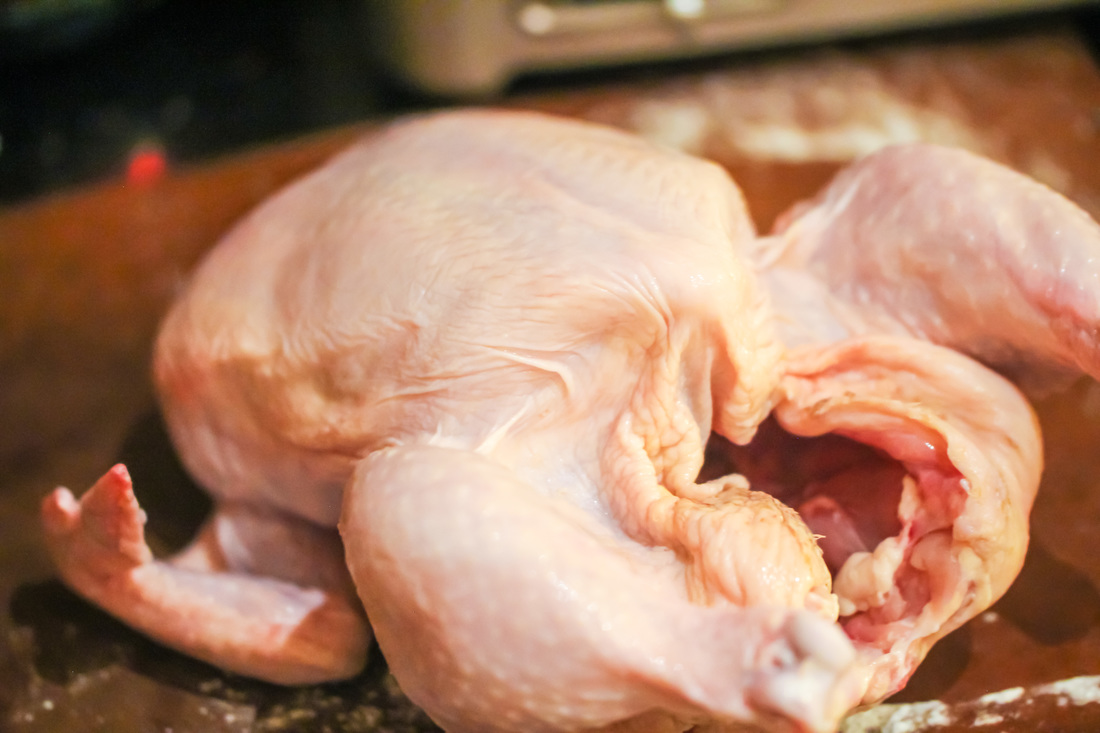
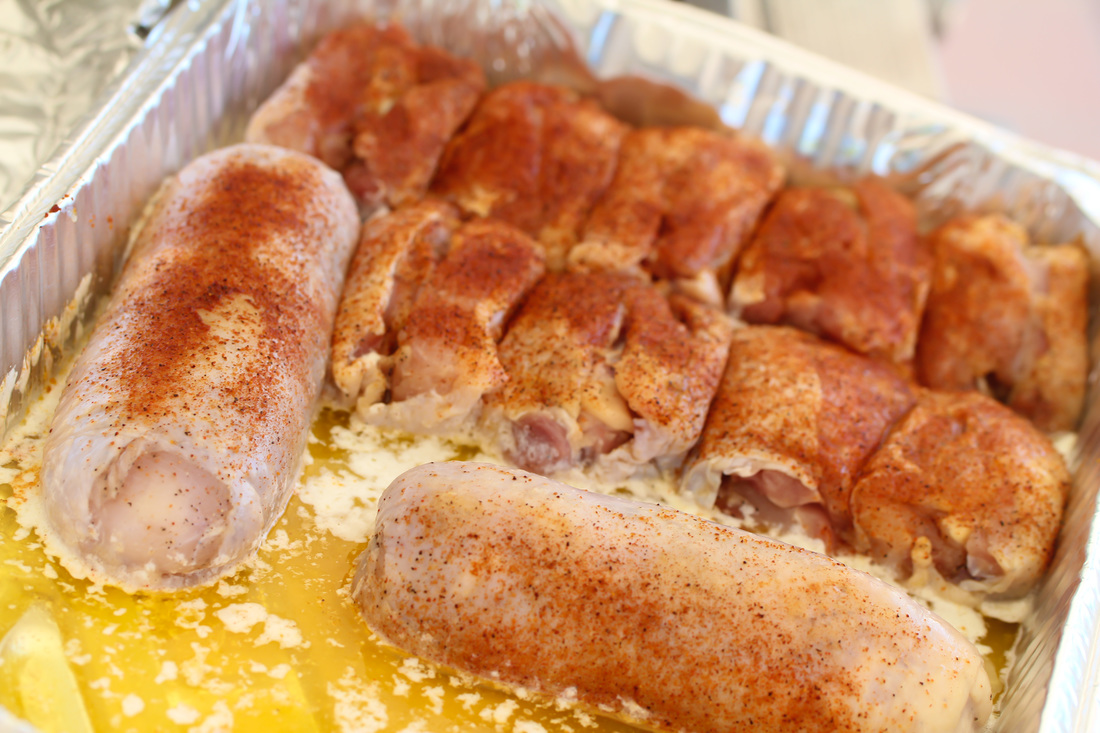
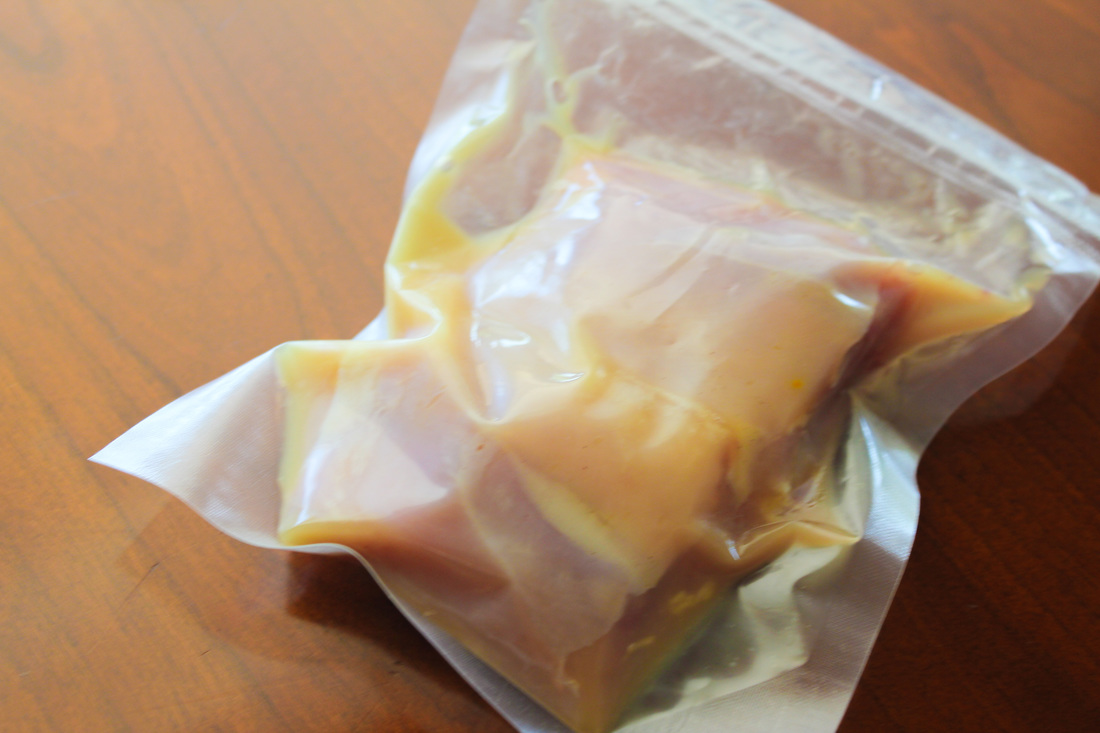
Carefully tear the skin of the whole chicken and trim the skin so it fits nicely around the chicken breast roll. Sprinkle your favorite chicken rub on the chicken roll and then sprinkle the backside of the skin with more meat glue. Wrap the skin around the chicken roll and put back in refrigerator for another 8 hours or so. When done, inject breast with some brine and sprinkle outside of skin. You are now ready to start cooking.
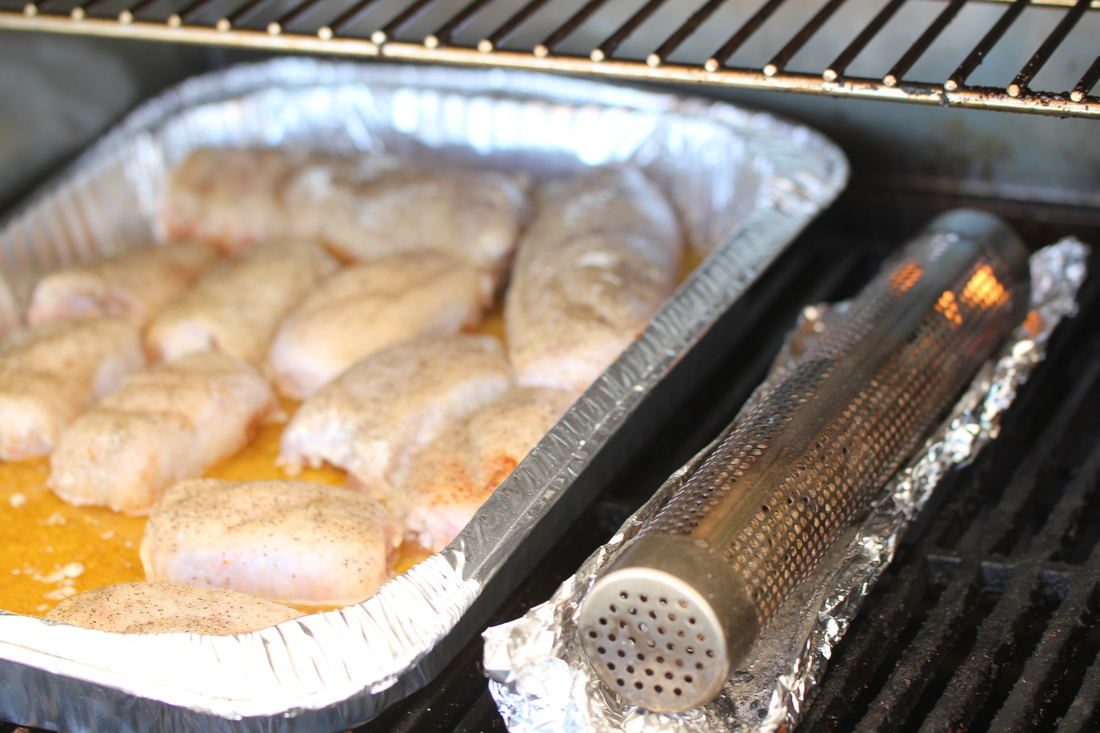
Place the rolls in an aluminum pan on a bed of butter. Think 8 tablespoons of butter per roll. Cover the pan with foil and place in smoker on indirect heat 400 degrees Fahrenheit. Cook covered for about 45 minutes. After 45 minutes, open the pan and turn the rolls. Cover again with foil and cook for another 30-45 minutes. In order to get some smoke into your rolls, uncover the pan and smoke the chicken rolls for another 20 minutes at the same temperature. I use a light wood like apple or pecan. 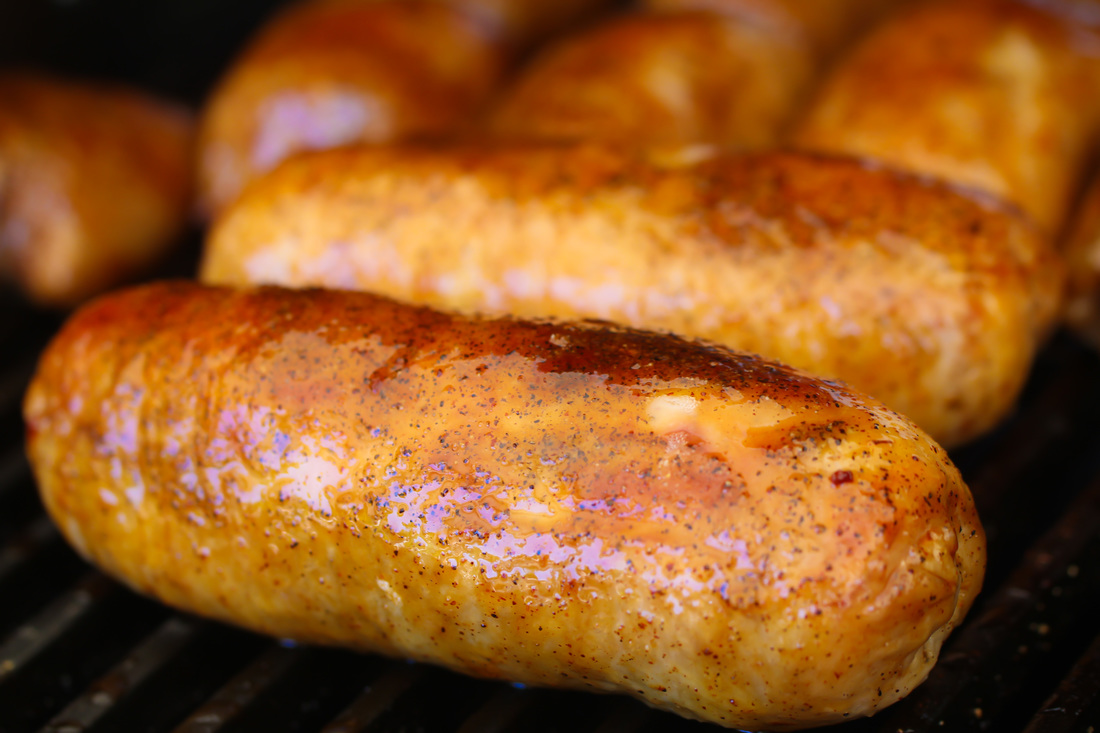 When the chicken rolls are getting to the right temperature - prepare your dipping sauce. I use 1/3 BBQ sauce, 1/3 Honey and 1/3 Apple Juice. Dip the rolls in dipping sauce. Put them back one final time on the smoker to caramelize the sauce. When they rolls have a nice orange shine, take them off the smoker, slice and serve!!  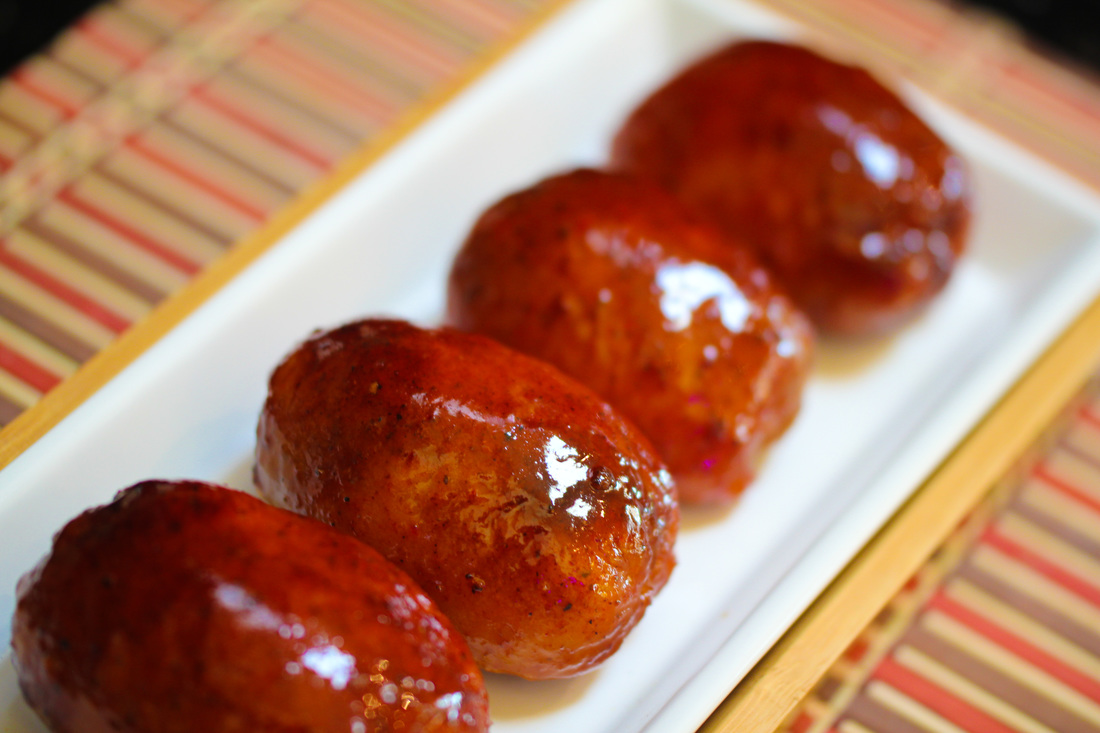 Smoking chicken thighs is a messy and tiring process, but when you get it right, there are few things that beats the flavor of succulent and moist chicken with a little heat and a lotta sweet. I prefer to remove the bones - you can enjoy the entire thigh that way - but you can skip that step if you want to save yourself some time.
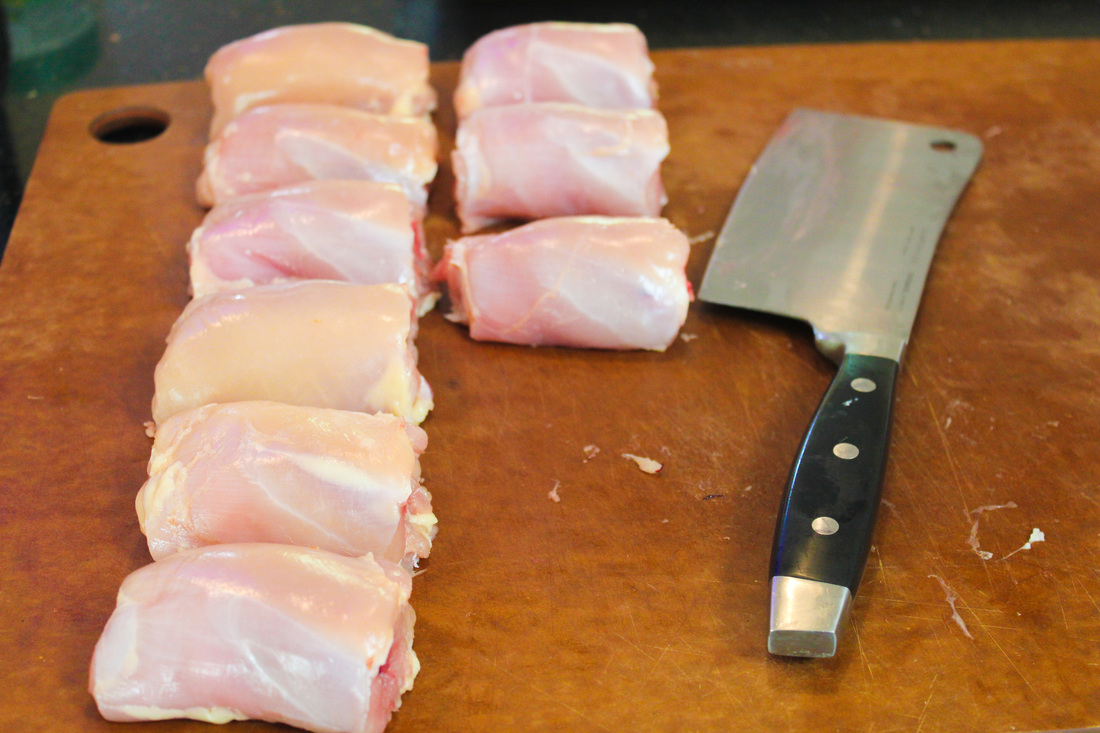
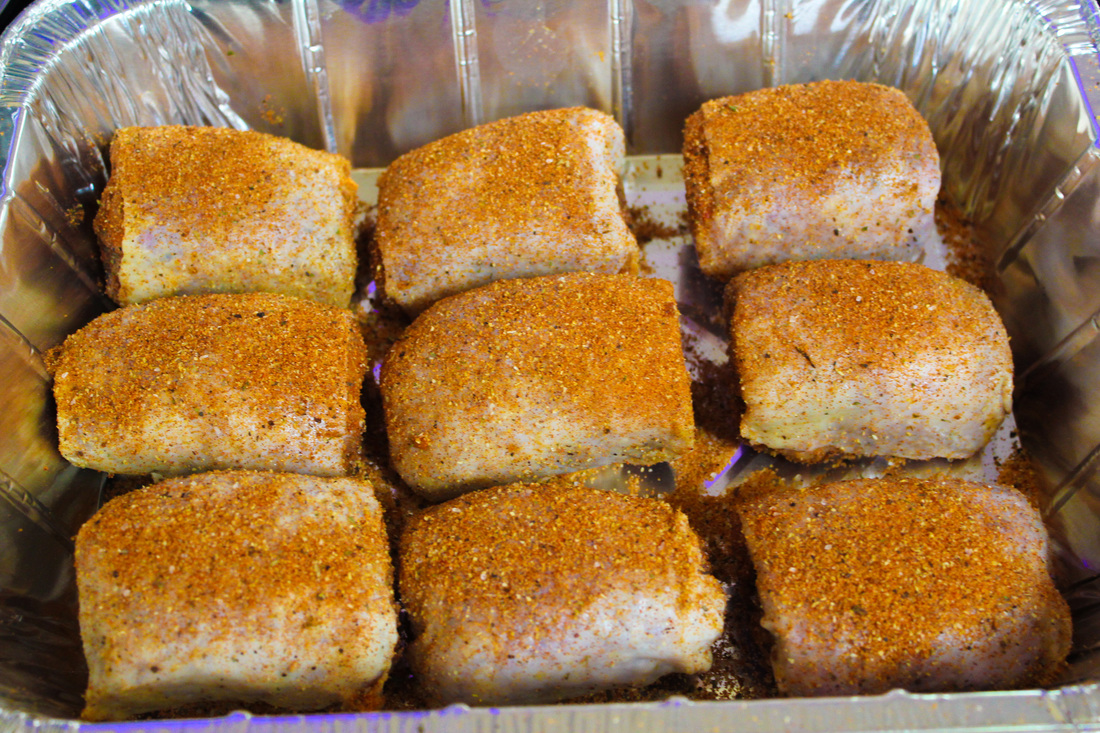
The first thing you have to do is to trim the chicken - you want uniform looking pieces with about the same size. They will cook more evenly and will also look better when you serve. Start with cutting the skin off each thigh. Be careful not to tear the skin. After you cut off the skin, cut the thighs in uniform pieces, turn the thigh over and then cut away muscle along the back of the thigh bone. This is where you can decide if you want to remove the thigh bone or not.
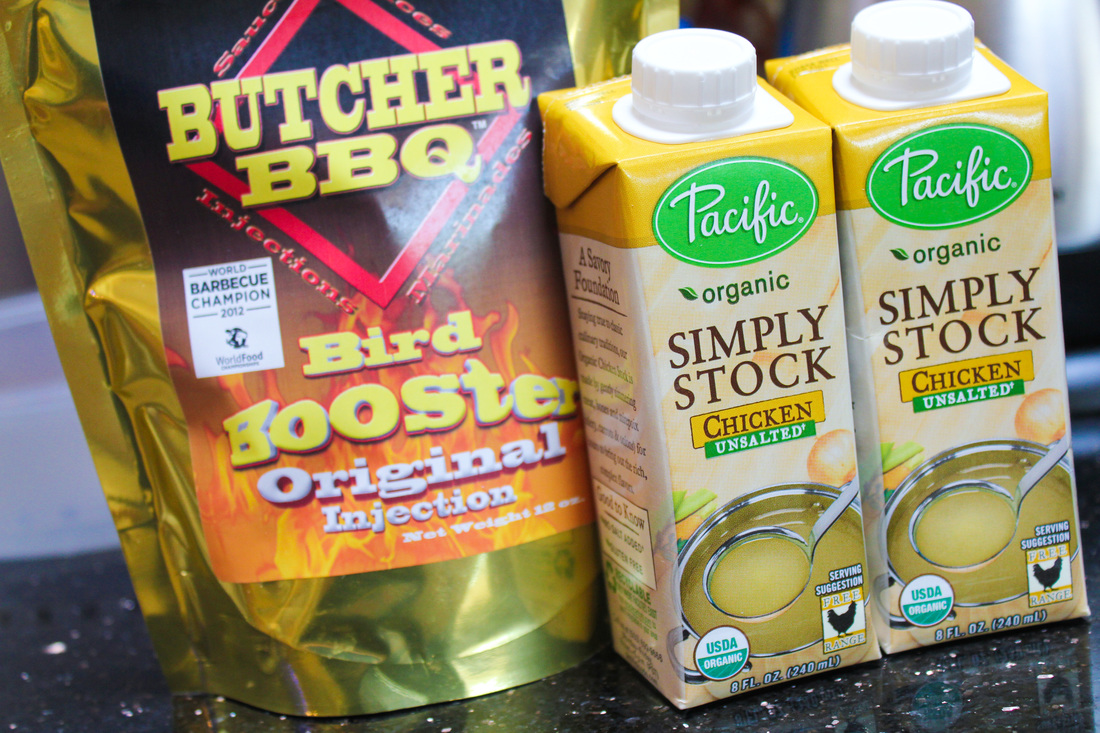
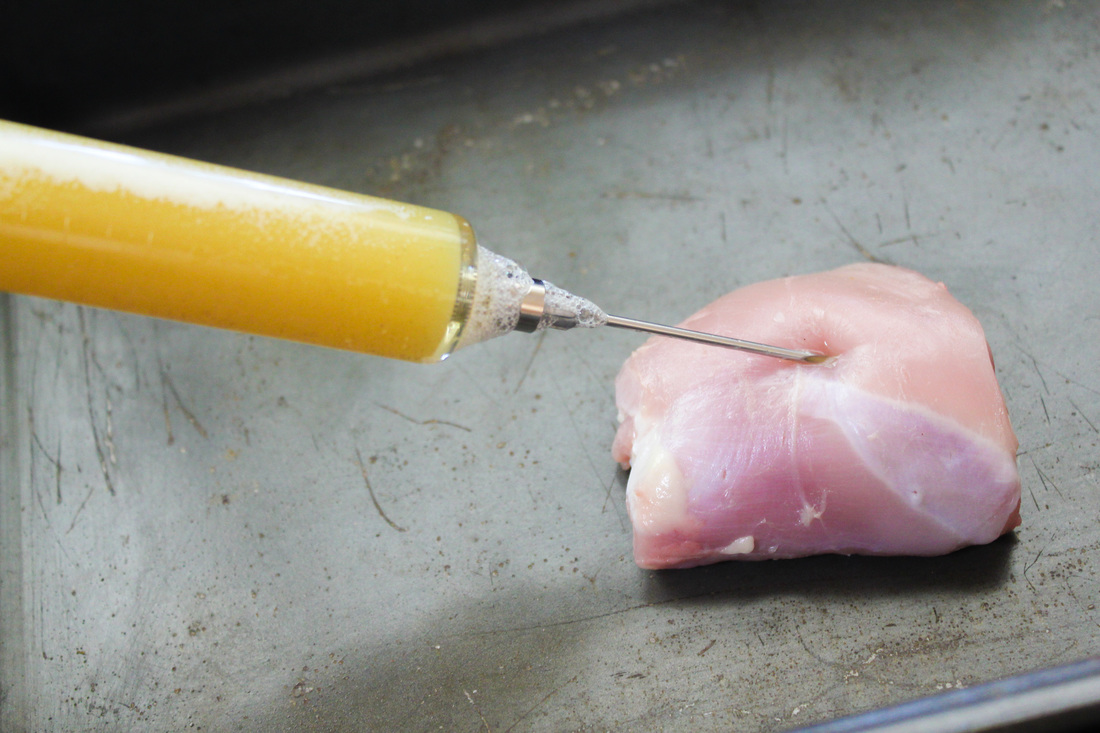
I like to either brine or inject my thighs. You can either use a very simple brine with water, salt and sugar or you can mix your own and try to get some flavor into the chicken thighs. When I inject I use chicken broth and Butcher BBQ Bird Booster and when I make a brine, I normally use water, salt, sugar and some of the Bird Booster. Let the chicken thighs rest in the brine for a couple of hours while you trim the skin.
Scrape excess fat off the skin. I usually put the skin in the fridge or freezer for a while to make the fat more solid. Then I use a boning knife to cut the fat off first. After I gotten the thick layer of fat removed, I scrape off the rest with my chefs knife. Be careful so you don't tear the skin. You want the skin to be translucent. You want the skin to slightly smaller than the thigh but it should wrap around the skin fully covering the front and most of the back. Season the chicken slightly with your base rub. I like something with a little bit of heat under the skin and for the back of the thigh.
It is now time to reattach the skin to the thigh. I prefer to use meat glue because it will create a stronger bond with the thigh and the skin. Sprinkle about a teaspoon of meat glue inside the piece of skin and sprinkle some on the thigh as well. You don't have to worry about the thigh taking on a weird flavor. Meat glue is flavorless when you cook with it. Wrap the skin around the thigh and the wrap in plastic wrap to make sure that the glue binds effectively. Put in refrigerator for at least 4 hours. Put your second rub on top of the skin - I prefer a cherry rub since it will give the thigh a very nice color.
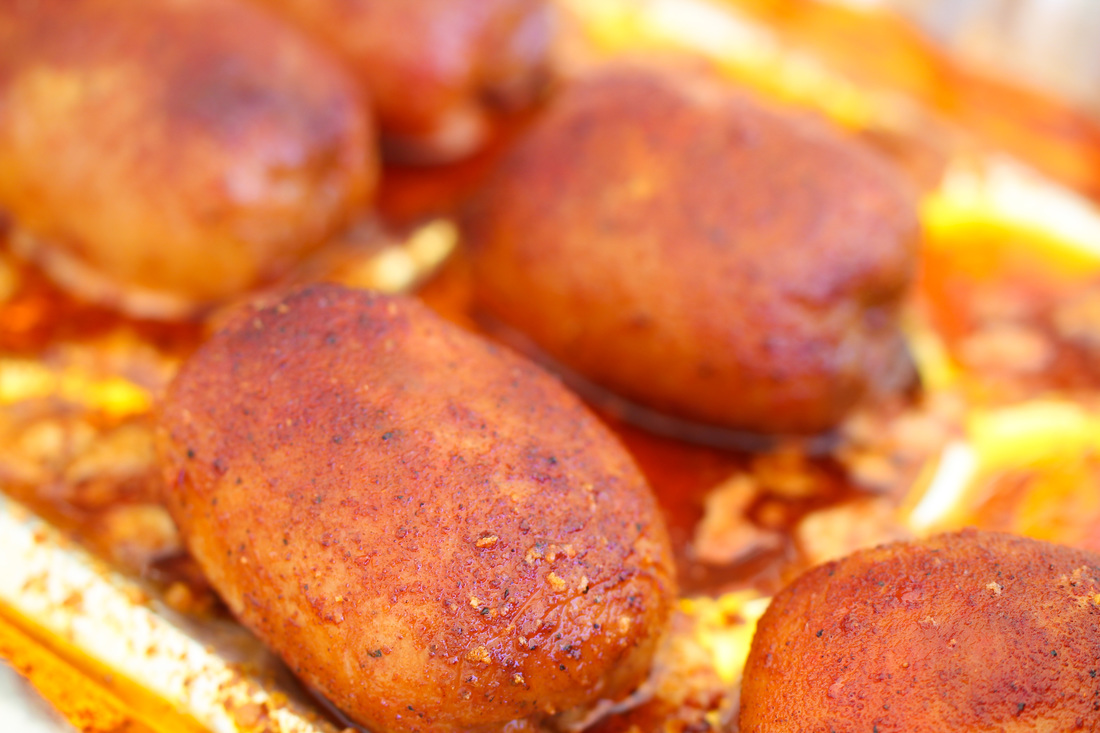
Make sure that the smoker has reach about 250 degrees Fahrenheit. For chicken thighs I use apple or cherry wood chunks for smoke. Make sure that the dirty smoke has worn off and that your smoker has a clean, thin, blue smoke coming out of the chimney. Place the chicken thighs in a pan on top of slices of butter, I use about two tablespoons of butter per thigh. Smoke until you get the thighs up to 160 degrees. Baste frequently with butter. While the thighs are smoking, mix your glaze. I use one third of BBQ sauce, one third of Agave honey and one third apple juice. Sometimes I put in a couple of other things to add flavor - like a fruit jelly or seedless marmalade. When the thighs reaches 160 degree - dip them in the glaze and return to the smoker. Smoke until they reach 165 and the glaze gets a little bit caramelized. Take them off the smoker and then let them sit under some foil and rest. Let them rest for about 10 minutes. 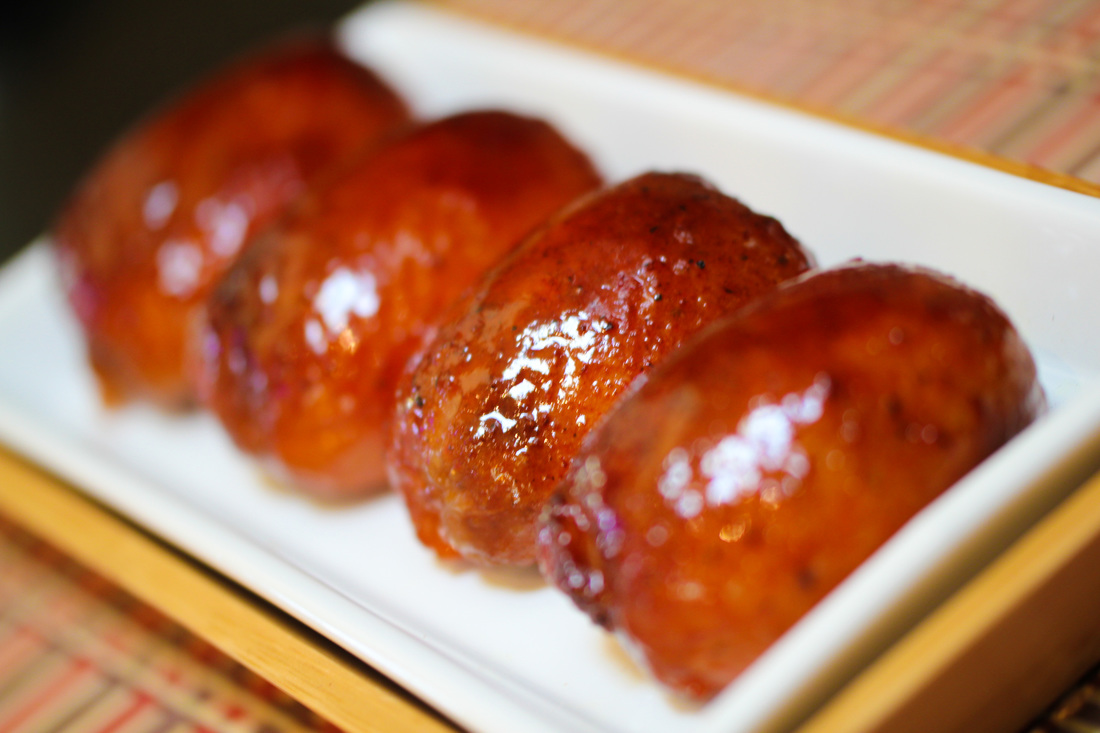 After the thighs are done resting - you should have some extremely moist chicken thighs with a wonderful bite-thru skin. A little smoke, a little heat and a lotta sweet - just like a chicken thigh should taste!!
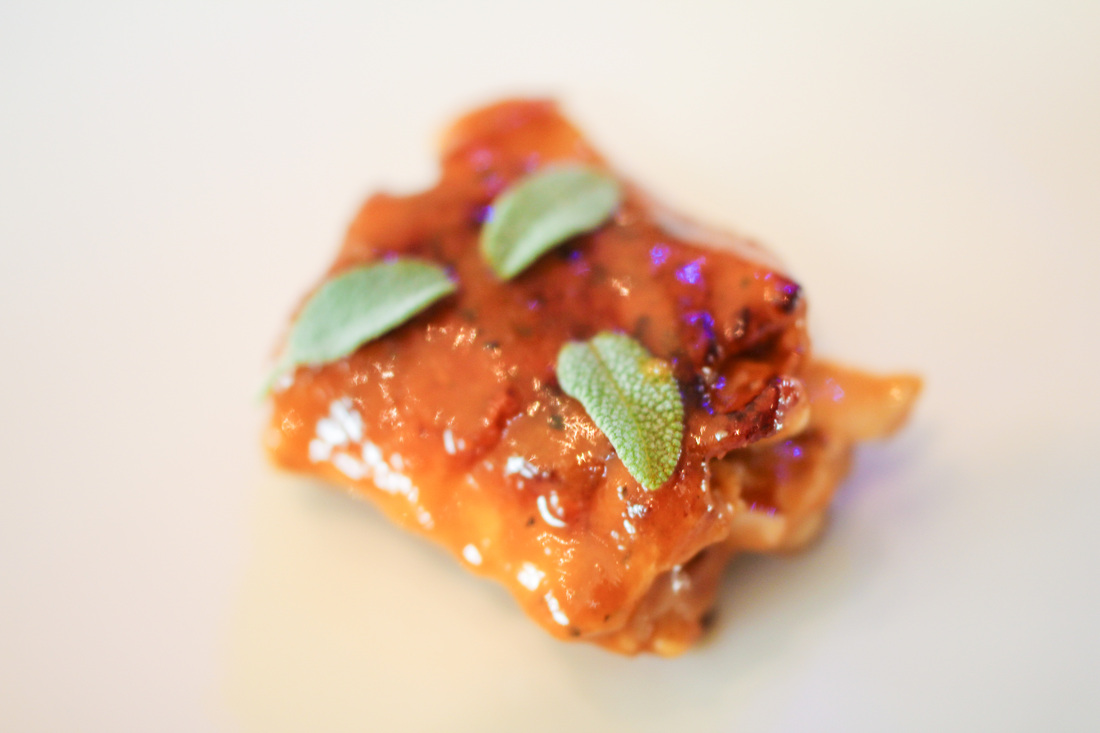
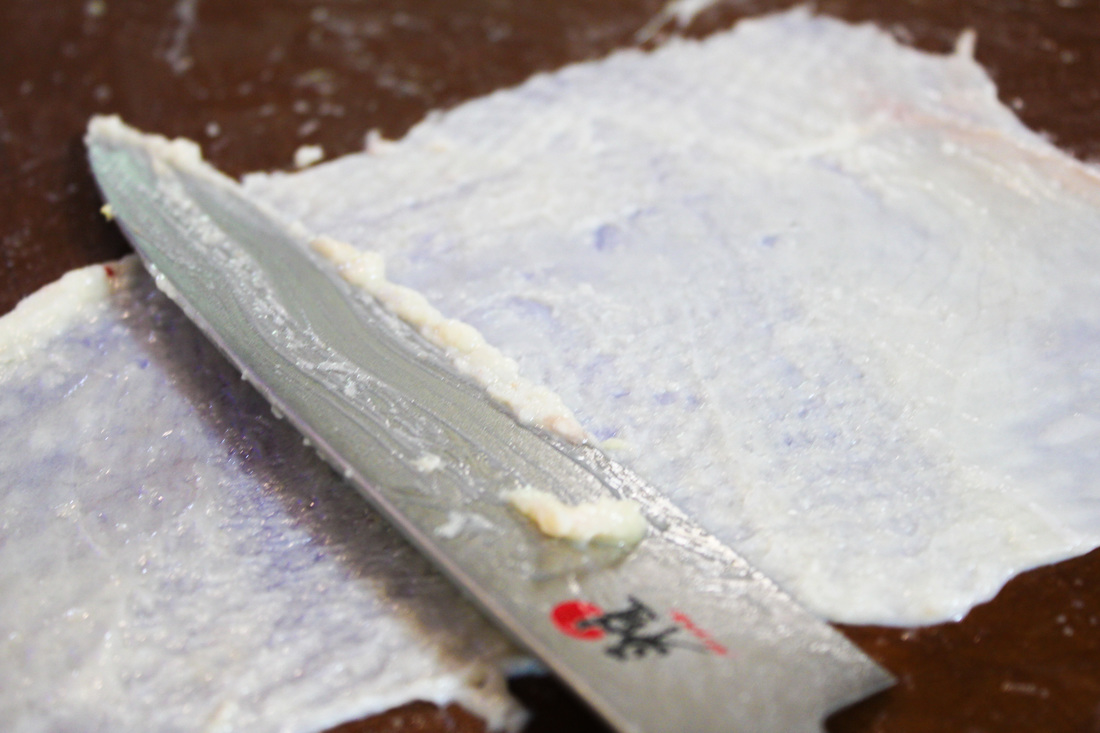
Ingredients: Turkey Wings Turkey Brine Butter Smoked Sea Salt Sage Dried Cranberries Here is a modern twist on the Thanksgiving Turkey, it is variation from Modernist Cuisine slightly simplified when it comes to ingredients. It is a bit-sized appetizer - perfect as a little taste teaser before the big bird gets carved up. And here is how you do it. First, use the middle part of the wing and chop off the joints to expose the two bones inside the wing. This is hard work and you might have to use a bone cutter. Next step, cure the turkey wing segments in a dry rub of salt and sugar for 24 hours.
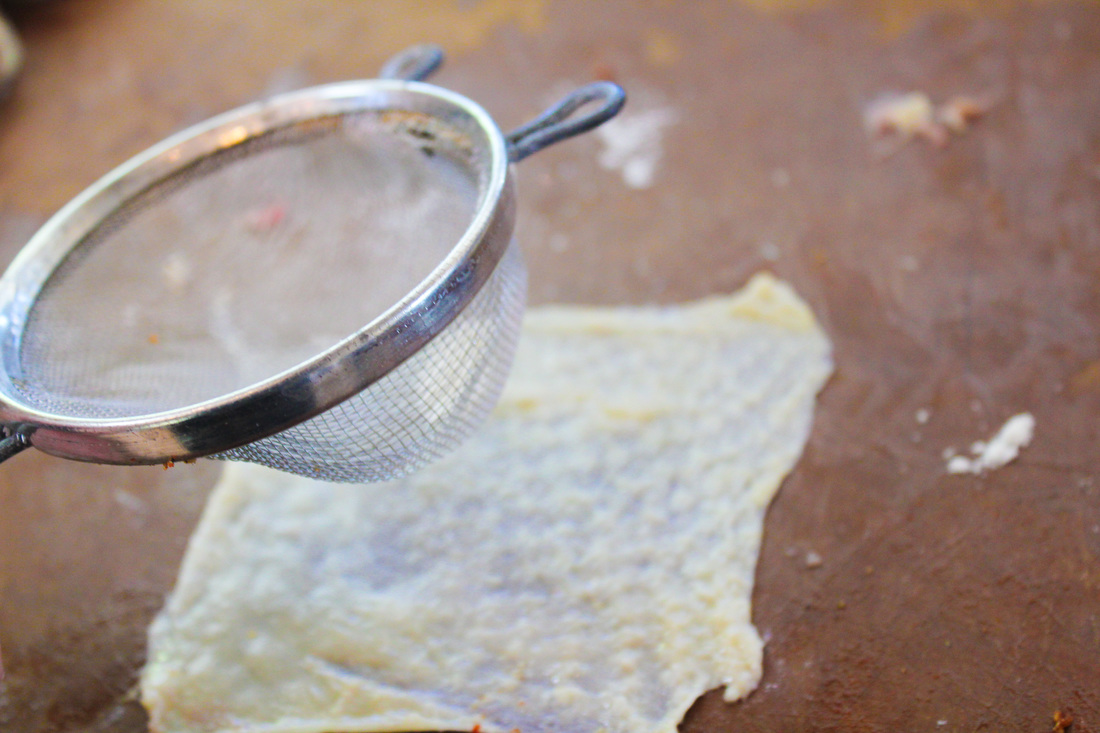
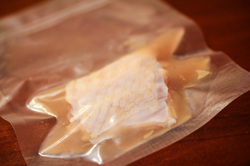
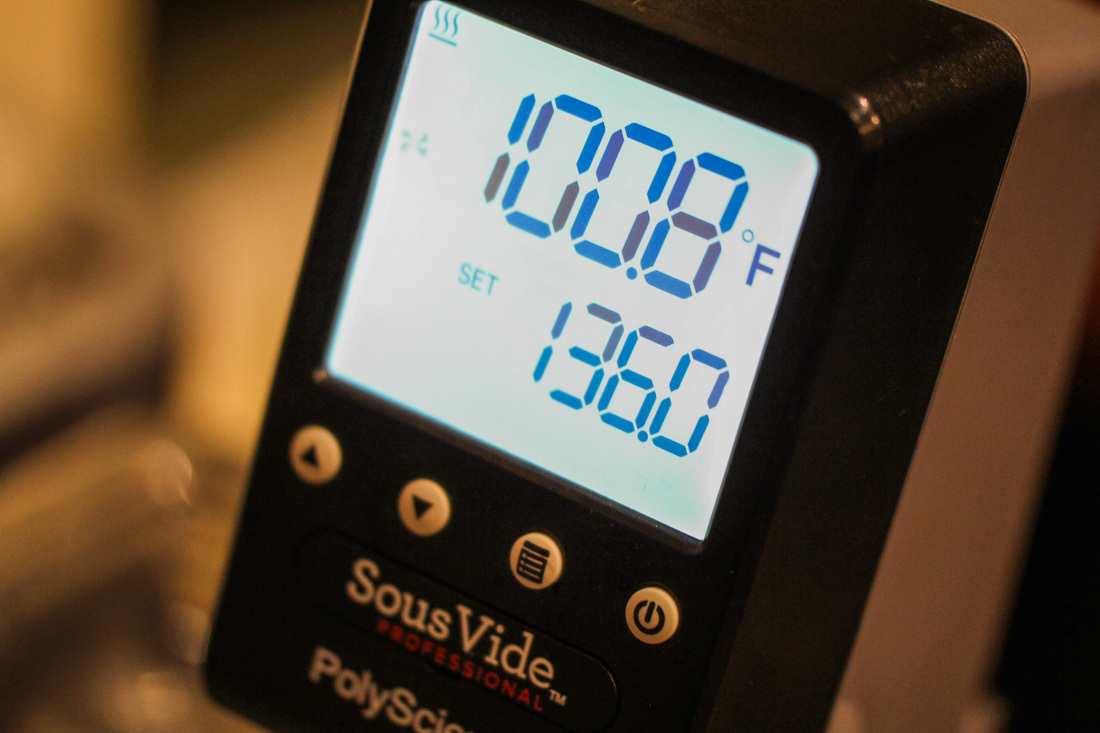
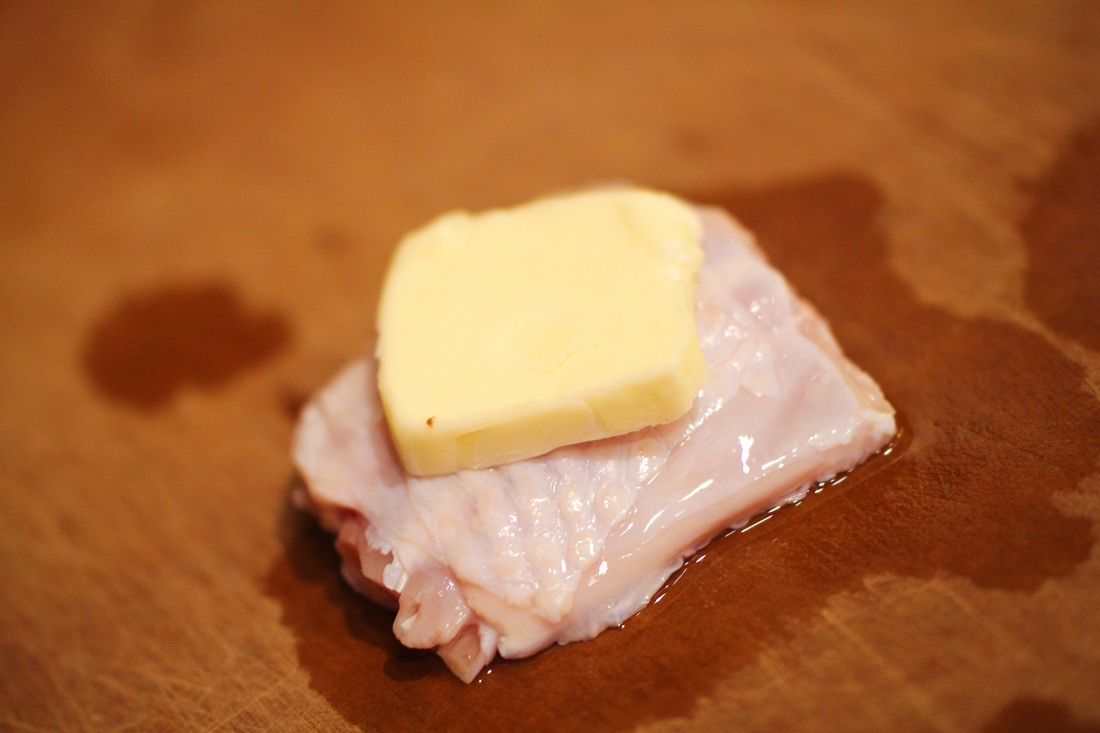
After being brined for 24 hours, rinse the cure off of the wing and vacuum seal it with some butter. Then cook it sous vide at 58 °C / 136 °F for 12 hours. When done, immediately pull the bones out of the wing while its flesh is still warm. If the wing has been properly cooked, the bones should just slide right out. Once the wings have cooled down, dust them in potato starch.
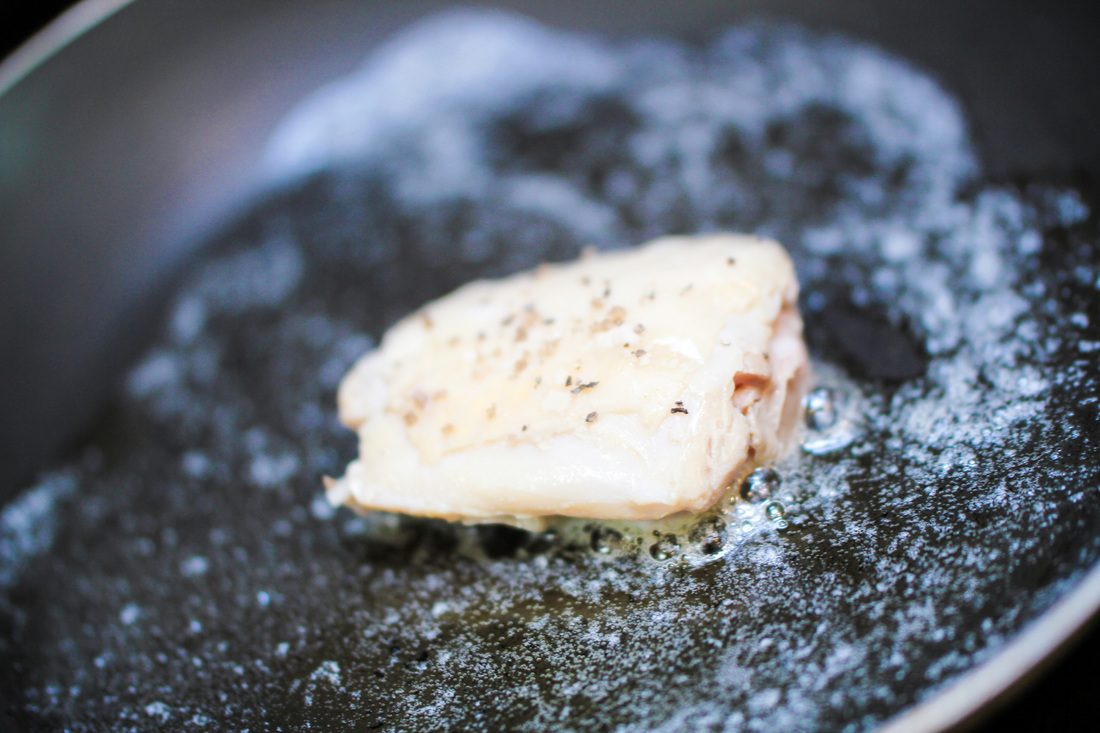
Once we have a crispy and tender piece of turkey, it’s time for the gravy. Baste the wing in gravy - use a thickener to make the gravy a little bit stiffer. Finish off the wing with smoked sea salt, bit of diced cranberry and picked sage. This recipe is a wonderful way of creating a nice little twist on an often very traditional Thanksgiving. 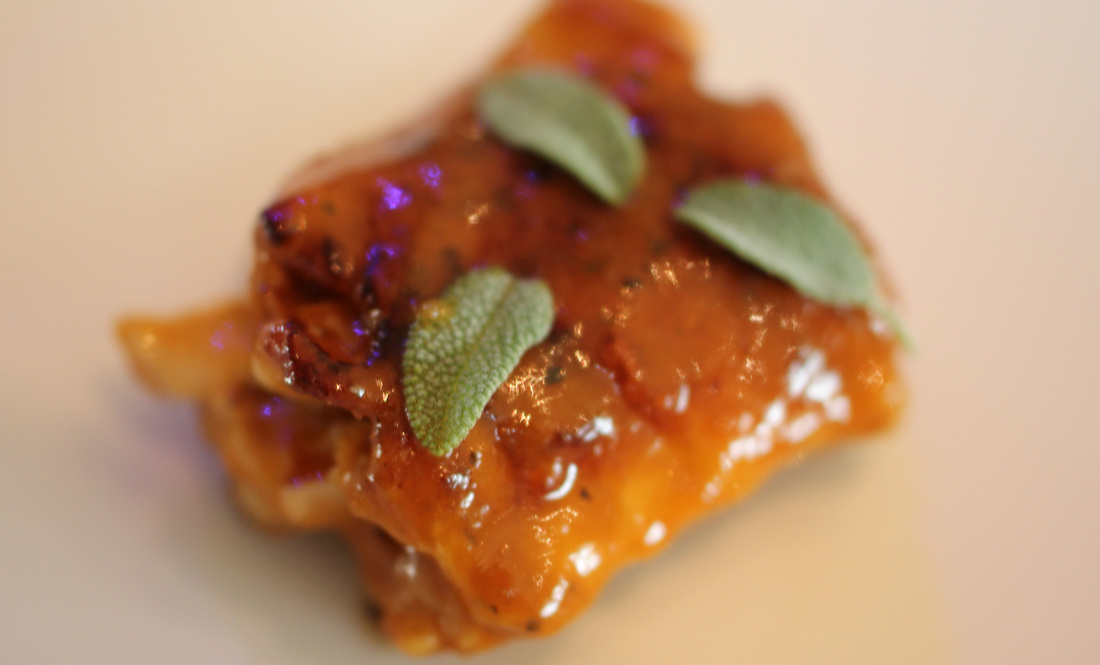
|
Cooking at home
In this section you will find recipes and food experiments that I have tried at home. Some successfully. Archives
January 2018
Categories
All
|
Cooking at home |


 RSS Feed
Web Hosting by FatCow